

.svg)
.svg)
.svg)
Sending the same email to multiple recipients separately in Outlook sounds easy until you try it and the replies mix, the privacy slips or the workflow slows. This is where most users realise Outlook needs the right method, not guesswork.
Outlook already has tools that keep every message separate, private and clean. You only need to match the method with the type of message you want to send.
The next steps walk through five practical options that make separate sending simple, fast and reliable for everyday communication.
Why Sending One Email To Multiple People Separately Is Not As Simple As It Sounds?
Once you've verified your email list, sending one message to multiple people feels simple until you understand how to send it in a way that protects privacy, keeps messages clear, and avoids messy threads Most users struggle because the process hides small details that shape the results.
Why CC And BCC Do Not Work For Each Recipient
Most people learn how to send an email by adding names in the To, CC and BCC fields and sending the same email to everyone at once. This works for announcements, but it fails when each recipient should feel the message is meant for them alone and when you want replies to stay private.
Key issues with CC and BCC for separate sending
- The To field makes everyone visible, which is a problem when you send emails to multiple clients or leads.
- CC keeps people in the loop but does not hide addresses, so it still exposes the email address of each recipient.
- BCC hides addresses, yet every person receives the same email and can still reply in ways that feel impersonal.
- Using the BCC field also gives you no control over how replies arrive, which makes the conversation difficult to manage.
Example
- You send the same email to multiple recipients separately in BCC about a pricing update. One client clicks Reply All by mistake, and suddenly every other client sees a private negotiation.
The moment you need a message that feels direct and personal for each recipient, CC and BCC quickly reach their limits.
How Exposed Email Address Lists Create Privacy Problems
When you send an email to multiple people and their addresses are visible, you turn a simple update into a privacy risk. Many industries treat email visibility seriously, and even one exposed address can damage trust, especially when recipients never agreed to share their contact details with each other.
Where exposure creates problems
- Group emails with strangers, such as contest participants or newsletter sign ups, can reveal the email addresses of people who never met.
- Business updates sent to multiple recipients can leak a client list to everyone in the thread.
- Internal emails shared outside the company may show the structure of teams and roles that should remain private.
- Even if you do not share sensitive content, people still judge how carefully you handle their email address.
Example
- You want to send an email to multiple people who filled out a form on your site. If their addresses appear in the To field, some may unsubscribe or complain because they did not consent to being part of a visible list.
Once privacy is broken, no method or apology fully restores the confidence that you manage contact details carefully.
Why Separate Replies Become Hard To Track
Sending the same email to multiple recipients separately should keep each conversation on its own path. In practice, replies often land in one crowded inbox view, and when subjects match, it becomes hard to tell who said what and which thread needs a response first.
Where reply confusion starts
- Identical subject lines make dozens of messages look the same in your inbox.
- People change the subject or forward the email to others, which breaks the original chain.
- You want to send the same core message to everyone, yet each person asks different follow up questions.
- When you respond quickly, it becomes easy to mix names, details and attachments between threads.
Example
- You send the same email to multiple recipients individually in Outlook about a project update. Several people reply with changes, but because the email looks identical, you lose track of who approved which version.
Without a clear way to separate, label and respond, each new email adds noise instead of clarity.
How Personalization Breaks When Sending The Same Email To Multiple People
People are used to tailored messages, and they quickly notice when your email feels like a copied template. When you send the same email to multiple recipients separately without personal fields, the content can sound cold and generic. That lowers engagement, even if the information is useful.
Where personalization usually fails
- You use one greeting like “Hi there” or “Dear Sir or Madam” for everyone and lose the chance to connect with each recipient.
- Details such as company name, role or past interaction never appear, so the email feels like a broadcast, not a direct note.
- You can use basic tools to send a mass email, but without merge fields, the message still reads like a bulk blast.
- When you need to send personalized emails to leads or clients, manual editing for each email quickly becomes slow and error prone.
Example
- A sales team decides to send the same email to multiple recipients separately about a new offer. None of the emails mention the recipient’s company or use their name, so response rates stay low even though the offer is relevant.
Once you see how fragile personalization becomes at scale, it becomes clear why smarter methods matter for both results and relationships.
Taken together, these problems show that the challenge is not just how to send an email, but how to match the method with privacy, clarity and personalization, which is exactly what the next section breaks down through specific Outlook methods.
5 Easy Outlook Methods For Sending The Same Email To Multiple Recipients Separately
Before you try to send an email to a list of people, Outlook offers several built in methods that behave differently based on personalization, speed and structure. Understanding these approaches helps you pick the one that fits your task rather than forcing a workaround.
1. Mail Merge In Outlook To Send Each Recipient A Separate Email
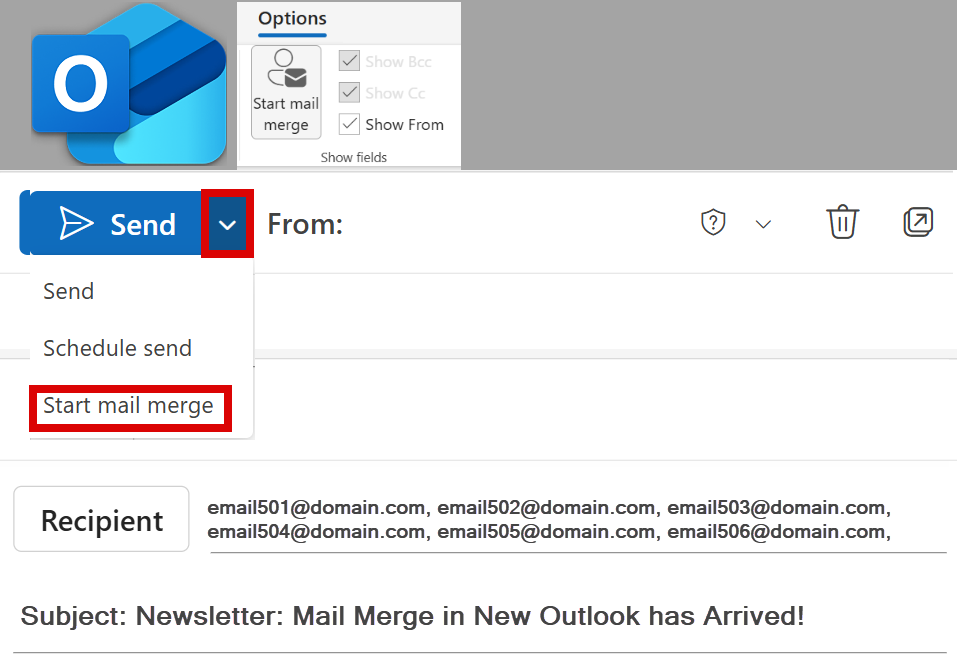
Using mail merge features gives you a structured way to send the same email to multiple people without losing personalization. It connects your data source with your message so every recipient receives their own version. This makes separate delivery feel as seamless as sending one message.
1. Open Word And Go To Mailings
Open Word and move to the Mailings tab so you can work with merge tools instead of a regular document.
2. Start Mail Merge And Select Email Messages
Choose Email Messages so Word formats the file for sending through Outlook.
3. Select Recipients And Upload Your Excel List
Import an Excel sheet that holds every recipient’s name and email address.
4. Type Your Email Content Inside Word
Write your message in Word and keep the structure simple for cleaner merging.
5. Insert Personalization Fields Like First Name
Add fields such as First Name or Company Name to make each email feel personal.
6. Finish And Merge To Send Email Messages
Generate individual emails by sending each merged copy to Outlook.
7. Add The Subject Line And Confirm Sending
Enter a subject, choose the field containing email addresses, and send.
Example
A consultant sends personalised project summaries where each email includes the client’s name and company details.
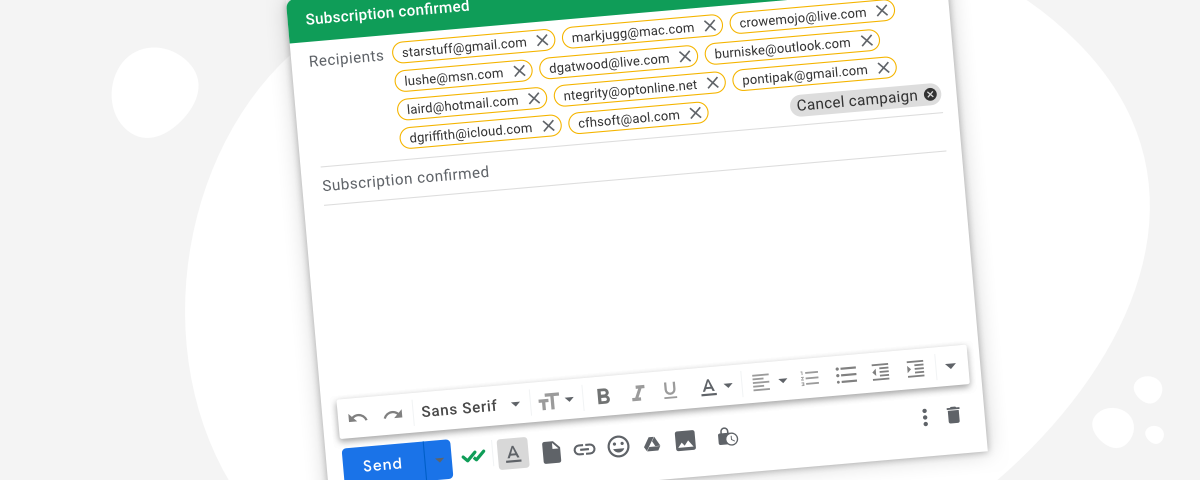
2. Using BCC When You Do Not Need Personalization
The BCC option helps you send the same email to multiple recipients separately when personalization is not required. It hides everyone in the bcc field, which protects privacy and avoids reply chaos. This method works best when the message stays identical for everyone.
1. Open A New Email In Outlook
Start a new message so you have a clean layout for your recipients.
2. Enable The BCC Option From The Options Tab
Show the BCC field so you can hide the recipient list.
3. Add Your Own Email In The To Field
Place your address in the To field to complete the email structure.
4. Add All Recipients Inside BCC
Paste all other email addresses in BCC to protect privacy.
5. Write The Email And Send It
Write a simple, universal message and send it once to deliver to all.
Example
An office manager sends a system outage update without exposing employee emails.
3. Using Third Party Tools For Bulk Individual Emails

Third party platforms simplify the process when you need to send bulk emails with cleaner automation and stronger delivery controls. These tools handle large lists smoothly while ensuring every message is delivered individually. They work well for users who want more flexibility than Outlook offers.
1. Install A Mail Merge Or Bulk Sending Add In
Choose an add in that works with Outlook and install it.
2. Connect Your Outlook Account Inside The Tool
Allow the tool to access your Outlook account for sending.
3. Upload Your Recipient List
Import a verified email list from Excel, your CRM or your contact export
4. Write Your Message With Personalization Fields
Compose your email and insert fields for names or companies.
5. Send Emails Individually Through The Tool
Deliver each message separately with automated sending.
Example
A business owner sends quarterly updates with personalised greetings through a connected add in.
4. Using Templates For Quick Manual Sending
Outlook templates help you send the same email quickly without rebuilding everything from scratch. You can store the base message, update only the essentials, and keep the flow consistent for each email. This approach works well when you want to stay in control of small batches.
1. Write Your Email Once In Outlook
Draft a full version of the message you often send.
2. Save It As An Outlook Template
Store it as a reusable template for future emails.
3. Open The Template For Each Recipient
Load the saved template and edit small details as needed.
4. Add One Email Address And Send It
Send the email to one person at a time to keep threads separate.
Example
A freelancer sends onboarding emails by editing only the client’s name and project details.
5. Using Quick Steps To Send Individual Emails Faster
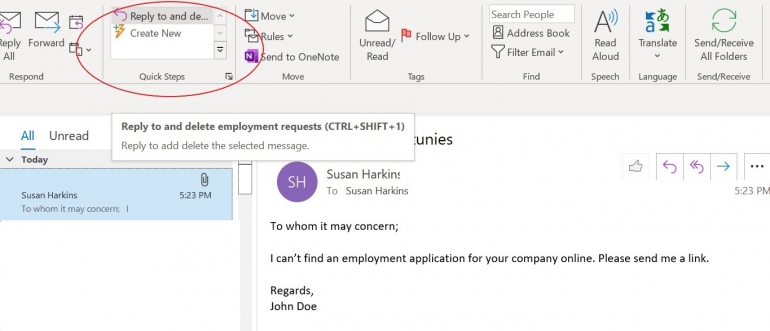
Quick Steps gives you a faster way to send an email to repeated contacts while reducing manual actions. You can automate common steps, apply set actions, and streamline repetitive sending with fewer clicks. It is a practical shortcut for users who want simple automation.
1. Open Outlook And Go To The Home Tab
Start from the Home tab where Quick Steps appear.
2. Select Quick Steps And Click Create New
Create a custom action for repeated email patterns.
3. Choose The New Email Action For Your Shortcut
Set the shortcut to open a new email automatically.
4. Add A Prewritten Subject And Message If Needed
Include a subject and base text to speed up your routine.
5. Save The Quick Step And Pin It For Easy Access
Save it with a clear name so you can use it whenever required.
Example
A team lead sends weekly check ins quickly using a Quick Step with a preset subject and base message.
Beyond Outlook: Smart Tools For Sending Emails To Multiple Recipients Separately
When you want to send personalized emails to a larger audience without Outlook limitations, smart external tools make the workflow smoother. These platforms focus on speed, accuracy and clarity while keeping every message individual.
1. Alore.io
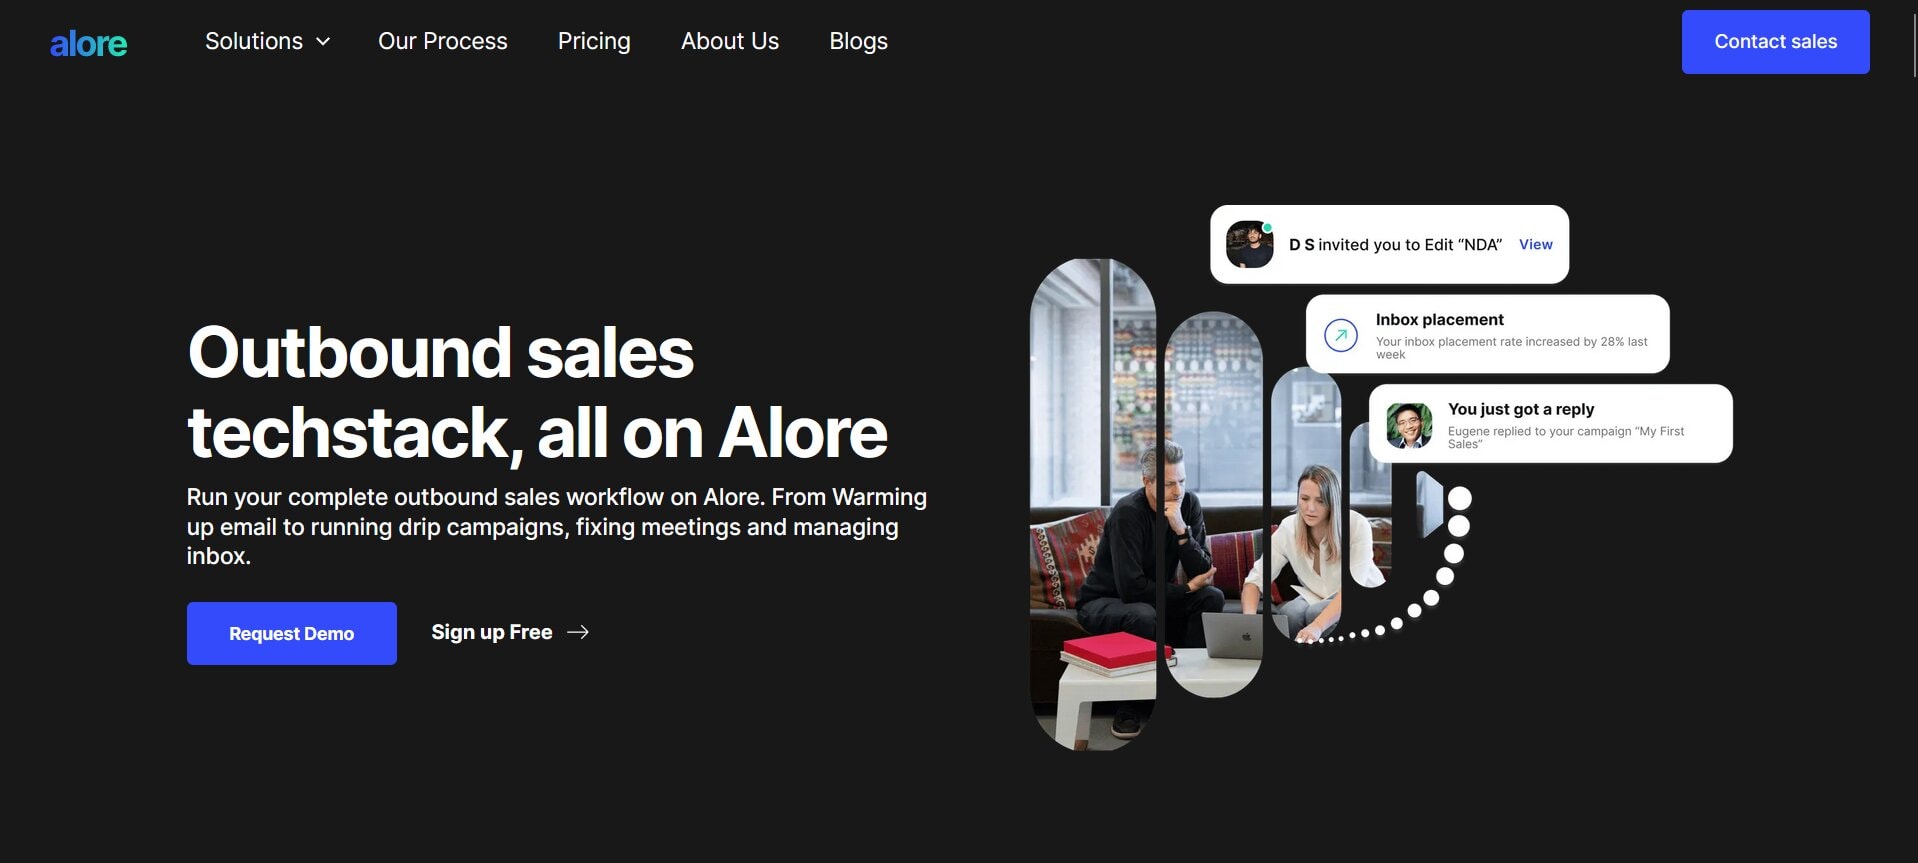
Alore.io focuses on precision and high quality delivery, which makes it ideal for users who want structured personalised emails without manual editing. It fits small teams, large lists and advanced outreach with equal ease.
Key Features
- Personalised one by one sending
- Automatic follow ups and sequences
- Contact list management with clear fields
- Strong inbox placement for large batches
- Mail merge style fields without using Word
Best For
Users who need personalised outreach that feels individual, even when sending to large groups.
Limitations
Requires a short setup to map your contact list and build your first sequence.
Price
Paid plans with advanced automation and warm up. Free trial available.
Example Scenario
A founder sends personalised investor updates with names, company details and tailored notes in each email.
2. GMass

GMass sends personalised messages directly inside Gmail and uses Google Sheets for data handling. It is simple, fast and good for daily communication needs.
Key Features
- Works inside Gmail
- Mail merge with Google Sheets
- Sends from your own email address
- Simple preview for personalisation
Best For
Small lists where speed and convenience matter more than advanced automation.
Limitations
Works best for short campaigns and does not scale well for heavy sequences.
Price
Paid plans, with a limited free version for basic sending.
Example Scenario
A coach emails participants personalised session details pulled from a Google Sheet.
3. Mailmeteor
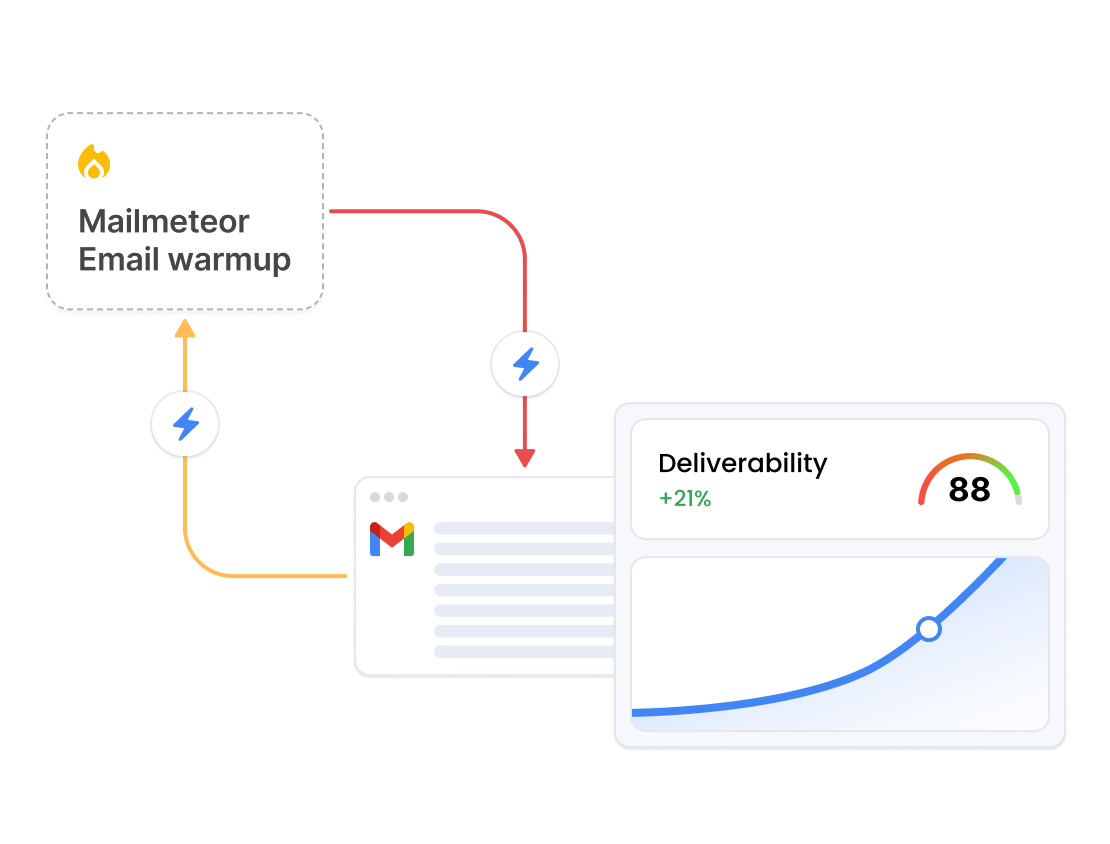
Mailmeteor focuses on privacy and simplicity. It sends individual messages in Gmail without storing your data on external servers.
Key Features
- Privacy centred sending
- Mail merge with Sheets
- Clean interface for personalisation
- Good deliverability for small batches
Best For
Users who want simple mail merge workflows inside Gmail with minimal setup.
Limitations
Not suited for advanced automation or long campaign flows.
Price
Free plan available, paid plans unlock higher sending limits.
Example Scenario
A teacher sends personalised schedule updates to parents without exposing any contact details.
4. Zoho Mail Merge

Zoho Mail Merge mail merge is built for teams already working inside Zoho CRM. It keeps communication and contact data in one place.
Key Features
- Direct CRM integration
- Easy merge field setup
- Structured templates for repeated sending
- Clean delivery for business focused messages
Best For
Companies that maintain their full communication process inside Zoho products.
Limitations
Less flexible if your data or workflow does not live inside Zoho.
Price
Included with Zoho plans that support mail merge.
Example Scenario
A service team sends appointment confirmations with each client’s name and service details.
5. Brevo

Brevo blends personalisation with design tools, which is useful for brands that want structure and style. It handles large lists without slowing.
Key Features
- Drag and drop template builder
- Good analytics and segmentation
- Works for large contact lists
- Automated flows for onboarding
Best For
Brands that want visually polished emails with personalised elements.
Limitations
Template design can take more time than text based tools.
Price
Free tier with paid plans for higher sending volumes and automation.
Example Scenario
A D2C brand sends personalised welcome emails with product suggestions based on user interest tags.
6. Mailchimp

Mailchimp is a strong choice for large newsletter style sending where branding and segmentation matter more than one to one personalisation.
Key Features
- Template designer
- Segmentation and tagging
- Strong reporting tools
- Smooth handling of very large lists
Best For
Newsletter campaigns, promotional emails and large audience updates.
Limitations
Less suited for emails that require personalised lines or dynamic fields.
Price
Free tier available, with paid plans for advanced segmentation and analytics.
Example Scenario
A travel brand sends seasonal newsletters to thousands of subscribers with destination ideas based on user interests.
Smart Email Tool Comparison Table (Curated for Real Decision Making)
Choosing the right tool makes separate sending faster and more precise, but even the best platforms can reveal issues you only notice once you start sending. The next part explains the common problems users face so you can avoid them before they interrupt your workflow.
Common Problems When Sending Email To Multiple People Separately
Most users learn how to send emails to multiple contacts only after facing real world issues like formatting breaks, missing fields or inconsistent deliveries. These problems happen because separate sending has its own rules that do not show up in regular email use.
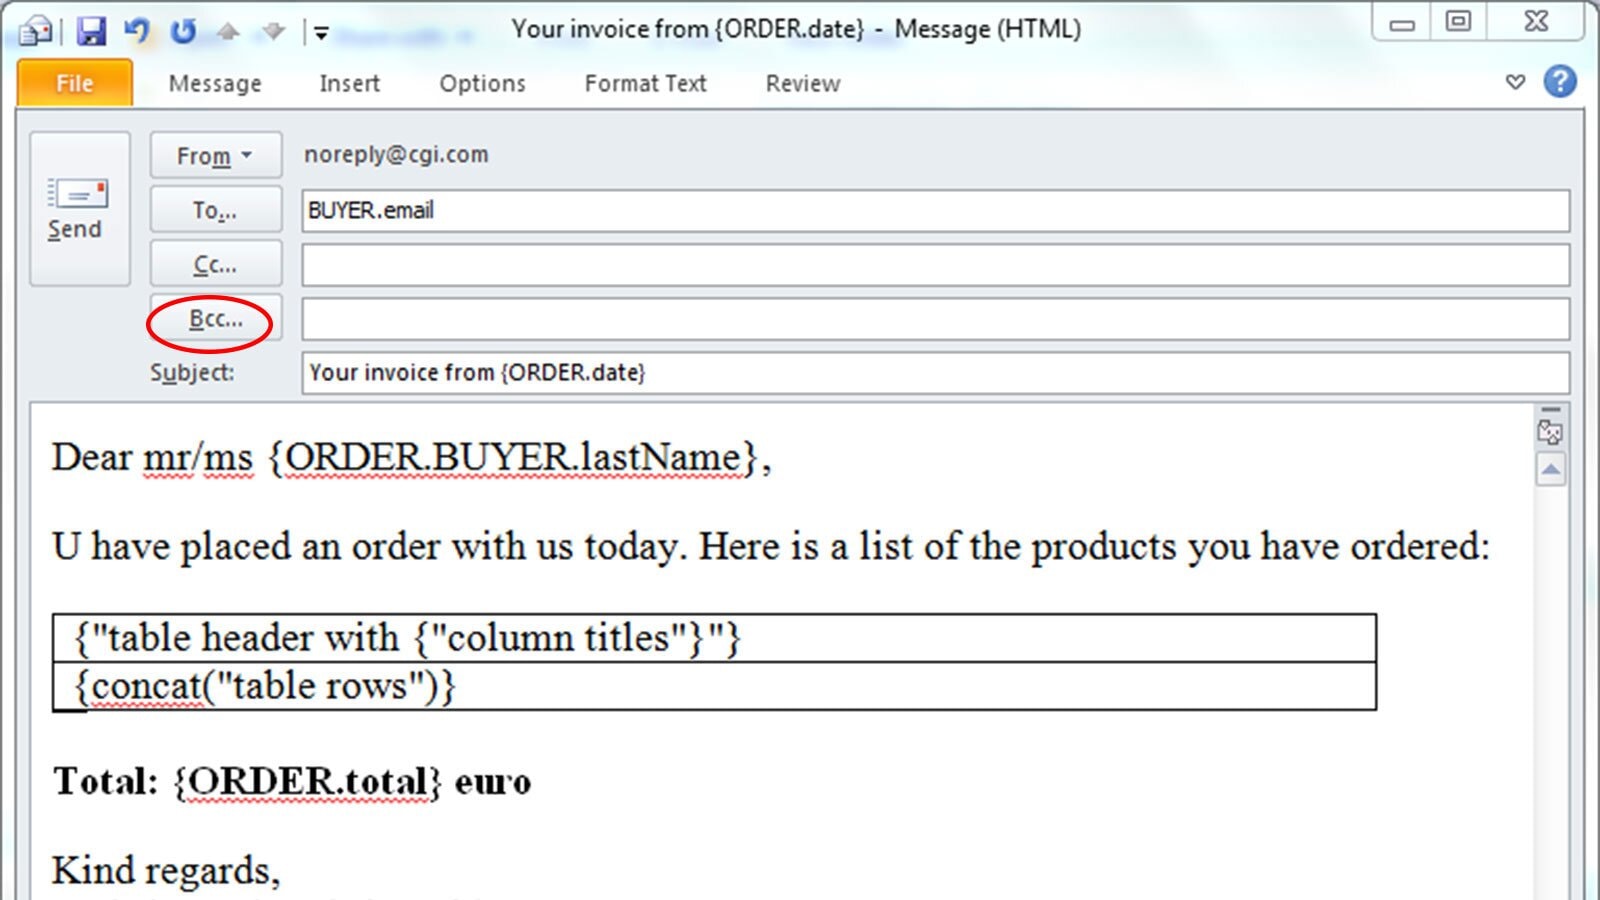
1. Outlook Mail Merge Not Picking Up Recipient Data
Mail merge in Outlook can miss recipient data when the source file is not clean. Small issues in the sheet, such as extra spaces or merged cells, can block fields from loading into your email. Fixing the structure of the file is usually more important than changing settings in Outlook.
Common causes
- Column names in Excel do not match the fields you select in Outlook
- Extra blank rows or hidden columns confuse the merge mapping
- Mixed data types, such as numbers and text in the same column
- Filters or sort orders applied on the sheet before you use mail merge
How to fix it
- Make one header row with clear field names
- Remove blank rows and unneeded columns
- Keep one data type in each column
- Test with a small list before sending the full batch
Example
A recruiter sends merged emails and notices some names stay blank. They discover that the First Name column has two header rows, so Outlook never reads the right field.
2. BCC Field Not Visible Or Not Working
When the bcc field is hidden, you lose one of the simplest tools for private group sending. Outlook can turn this field off after layout changes or updates, which makes users think the feature is broken when it is only hidden from view.
Common causes
- Ribbon layout reset after an update
- Custom view that hides BCC from the compose window
- New device or profile that uses default settings
How to fix it
- Open a new email and use Options to show BCC again
- Save this view so Outlook remembers the setting
- Check that your admin settings do not restrict the field
Example
Someone switches to a new laptop and no longer sees BCC when writing an email to multiple people. Showing the field from the Options tab restores their usual workflow.
3. Personalization Fields Showing As Blank
Blank personalization fields make emails look unprofessional. The text loads, but names, companies or custom details stay empty because the mapping between your sheet and your email is broken. This is a data issue, not a sending issue.
Common causes
- Column titles in your sheet do not match the merge fields
- Some rows are missing values for that field
- Extra spaces or invisible characters in header names
- You use the wrong field when inserting a merge tag
How to fix it
- Standardise column names such as FirstName, LastName and Company
- Check for missing values in key fields and fill or remove those rows
- Reinsert fields from the list rather than typing them by hand
- Preview several records before you send the full batch
Example
A sales team sends a campaign and sees “Hi ,” at the top of many emails. They find that the First Name column has trailing spaces, so Outlook cannot match it with the field they chose.
4. Emails Landing In Spam For Multiple Recipients
Emails to multiple recipients are more likely to trigger spam filters if your sending pattern looks risky. Filters look at content, sending speed and reputation at the same time, so one weak area can lower inbox placement for the whole batch.
Common causes
- Using the same subject and body too often in a short period
- Large lists on a new domain or new address
- Heavy use of links, images or promotional phrases
- Sudden jumps in volume when you send the same email many times in one day
How to fix it
- Warm up new addresses slowly
- Keep copy clear and simple without too many links
- Spread large sends across more than one time block
- Remove bounced or inactive contacts from your list
Example
A small company sends a discount email to a full list in one push. Many messages land in spam because the domain is new and the spike in volume looks suspicious to filters.
5. Outlook Rate Limits Blocking Bulk Sending
Outlook limits how many emails you can send in a short time frame. These limits protect the system but can interrupt you if you send many similar emails in one session. Rate limits are not a bug, they are part of how the service controls risk on the server.
Common causes
- Sending high volumes from a new or rarely used account
- Repeated campaigns with similar wording to many contacts
- Short gaps between large batches of emails
How to fix it
- Break your list into smaller groups and send in stages
- Plan sends across several hours or days
- Work with your admin or provider if you want to increase safe limits
Example
An event organiser sends 600 reminders within minutes. Outlook stops further sending and shows an error, so they adjust their plan and send in smaller blocks across the morning.
6. Attachments Not Supported In Mail Merge
Mail merge tools send the body of your message but do not attach files to each copy. The system reads your email as a single template, which is why attachments fall outside the normal merge flow. This can be confusing if you want to send a brochure or PDF with every message.
Common causes
- Expecting standard mail merge to handle attachments
- Assuming that file links and file attachments work the same way
- Needing different attachments for different recipients in one merge
How to fix it
- Use links to shared files instead of direct attachments
- Use add ins that support attachments if you want to send files at scale
- For small lists, send key documents in a separate, manual email thread
Example
A school tries to send a merged email with fee receipts attached for each parent. They later learn that standard Outlook mail merge does not include documents on the email and switch to using download links.
7. Replies Getting Mixed Into One Thread
When many recipients reply to a similar message, your inbox can fill with near identical threads. If the subject line and content match, some email clients group replies together. This makes it hard to follow which reply belongs to which person.
Common causes
- Same subject line for every recipient
- No unique reference for each email
- Email client settings that group similar threads
How to fix it
- Add a small unique marker, such as a name or code, in the subject
- Use folders or rules to sort replies by topic or list segment
- Tag or flag important replies as you read them
Example
A support manager sends a feedback request and then finds all responses stacked in one view. They change future subjects to include a short client code, which makes replies easier to track.
8. Formatting Breaking When Sending To Many Recipients
Formatting that looks clean on your screen can break on different devices. Email clients read HTML and styles in their own way, so complex layouts are more likely to fail when you send to varied platforms at once. Simple structure usually travels better than heavy design.
Common causes
- Pasting content directly from Word or web pages
- Using many fonts, colours and alignment changes in one email
- Relying on wide tables that do not resize on mobile
How to fix it
- Compose in the email editor or use plain formatting
- Keep fonts, sizes and colours consistent
- Test on desktop and mobile accounts before sending a large batch
Example
A team sends a table heavy update and mobile users see broken rows. They later replace the wide table with short bullet points and clear headings, which display correctly for everyone.
Once you know where these problems start, you can change how you set up lists, templates and tools, and the next section turns that awareness into best practices that keep separate sending steady in everyday work.
Best Practices For Sending Email To Multiple Recipients Separately
Knowing how to send emails correctly is the difference between clean communication and cluttered inboxes. Best practices offer simple habits that improve clarity, avoid privacy mistakes and make the entire process more efficient for both you and your recipients.
1. Personalize The Greeting For Each Recipient
Personal greetings make the message feel directed rather than broadcasted. Even a small detail like a first name helps your email stand out in a crowded inbox. This is particularly useful when you use the mail merge for structured personalization.
Example
A manager sending weekly updates adds each employee’s name in the greeting so the message feels direct and intentional.
2. Avoid Exposing Any Email Address In CC Or BCC
Visible addresses reduce trust and break privacy expectations. Keeping recipient details hidden creates a cleaner communication flow and avoids accidental disclosure.
Checklist
- Keep the To field limited to your own address
- Use BCC only when discretion is required
- Review fields before pressing Send
3. Test The Email With Your Own Address First
A self test catches layout issues, spacing errors and broken links before they reach others. This small step saves time when sending to multiple contacts.
Example
Someone shares an onboarding email and sees that their logo shifts alignment on mobile. They fix the spacing before sending the final batch.
4. Keep The Subject Line Consistent Across All Recipients
A clear subject line makes replies easier to track and prevents threads from splitting across the inbox. Consistency also helps with search and follow ups.
Tip
Use one subject line for the full batch and adjust only when a message requires individual context.
5. Use Clean Recipient Lists Without Errors
A tidy contact list reduces errors and improves deliverability. Clean data keeps your sending workflow smooth and prevents bounces that slow down communication.
Checklist
- Remove duplicate entries
- Correct typos
- Standardise name and company fields
- Keep columns aligned for imports
6. Maintain A Safe Sending Limit To Avoid Spam Filters
Filters react to sudden spikes in volume, identical content and rapid sending. Staying within safe limits helps protect your inbox reputation and keeps your outreach steady.
What to do
- Break large sends into smaller batches
- Space out sending windows
- Warm up new email addresses slowly
7. Keep Email Formatting Lightweight And Stable
Simple formatting lowers the chance of errors across devices and apps. Minimal styling supports both readability and reliability when sending to many recipients.
Example
A wide table breaks on mobile screens, so the sender switches to concise bullet points that display correctly everywhere.
8. Track Replies Individually For Better Management
Tracking responses prevents confusion when many replies arrive at once. This habit keeps conversations organised and makes follow ups easier to manage.
Ways to track
- Use folders for project or client segments
- Apply flags or colour labels
- Archive closed threads quickly
Clear best practices create a foundation for smoother sending, and the next section brings everything together with practical steps you can apply in everyday communication.
FAQs
1. What Is The Best Way To Keep Large Recipient Lists Organized Before Sending Emails
Sort your emails into clear segments such as clients, leads or internal teams, then store each group in a structured sheet with consistent field names. This reduces errors when importing lists and keeps personalization clean for every batch you prepare.
2. How Do Email Clients Handle Group Replies When Messages Are Sent Individually
Most email clients treat each message as a separate thread, so replies return to you one by one instead of merging into a group conversation. This keeps conversations cleaner and prevents cross chatter between recipients.
3. What Should You Do If You Need To Attach Different Files For Different Recipients
Separate your list into smaller groups based on which attachment they need, then send each set individually. This approach avoids mistakes and ensures every person receives the correct document without mixing files across groups.
4. How Does The Mail Merge Feature Compare With Dedicated Email Marketing Platforms
Mail merge is ideal for personalised one to one sending, while marketing platforms offer automation, analytics and design tools for larger campaigns. Use mail merge when you want control and simplicity, and switch to platforms when you need scale and deeper segmentation.
5. How To Use Tracking Tools To Monitor Who Opened Or Clicked Your Email
Enable open and click tracking in your sending tool, then review engagement reports for each recipient. These insights help you see who interacted with your message and guide follow up actions. This is especially useful when you send same email to multiple recipients separately Outlook users rely on.
Conclusion
Sending individual messages at scale becomes easier once your tools, lists and workflow stay organised. The real advantage comes from building a routine that protects clarity and keeps every conversation focused.
When your structure is steady, sending to multiple people no longer feels complex, it becomes a simple part of daily communication. A clear system is all you need to move forward with confidence.


.webp)


.jpg)
