
.svg)
.svg)
.svg)
If you’ve ever hit “Send” on an email, you’ve used SMTP—even if you didn’t know it. Popular email clients like Apple Mail use SMTP to send emails, making it a core part of how messages are transmitted.
Short for Simple Mail Transfer Protocol, SMTP is what actually moves your emails from point A to point B. And yes, it still matters in 2025.
According to Statista, over 333 billion emails are sent and received daily—SMTP is behind nearly every one of them. These emails are sent using various email clients, including Apple Mail, which rely on SMTP for transmission.
In this guide, you’ll learn how it works, how to configure it, and why it’s still the backbone of email today.
What Is SMTP?

SMTP stands for Simple Mail Transfer Protocol, which is the set of rules your mail user agent follows to send emails. It’s the rulebook that helps your email travel from your computer to someone else’s inbox. If you’ve ever clicked “send” on an email, you’ve used SMTP—even if you didn’t know it!
Think of SMTP as the mailman for the internet. It takes your email messages and generates delivery status notifications, making sure they go to the right email server. Without it, your emails wouldn’t go anywhere.
Why SMTP Still Powers the Internet in 2025
Even in 2025, SMTP is still the main way we send email. Why? Because it works. Big tech companies, email service providers, and small businesses all still rely on it.
Here’s why it matters today:
- Over 333 billion emails are sent every day (Statista, 2023). Most use SMTP.
- It works with cloud-based SMTP services to send lots of emails fast.
- It’s safe. SMTP authentication and secure SMTP help block hackers.
- It connects with tools like IMAP protocol and Post Office Protocol to deliver incoming messages too.
So, if you're using email at work or chatting with friends—SMTP is doing the hard work behind the scenes.
How Email Travels: Behind the Scenes of the Email Sending Process

Ever wonder what happens when you click “send” on an email? It’s not magic—it’s SMTP. That stands for Simple Mail Transfer Protocol, and it moves each email message from the sender to the recipient, transferring your email messages across the internet, step by step.
Here’s how it works, in simple terms:
- You write an email in your email client like Gmail or Outlook.
- When you hit “send,” your smtp client talks to an outgoing mail server. SMTP clients (also known as sender SMTP) initiate the process of sending outgoing emails to the next server in the chain.
- That server uses smtp commands to pass the email through a series of checkpoints, specifying the sender’s and recipient’s email address to facilitate delivery.
- A mail transfer agent (MTA) picks it up and determines the recipient’s SMTP server and recipient’s mail server based on the recipient’s email address, then sends the email message onward.
- The message is delivered to the recipient’s inbox after reaching the recipient’s SMTP server, which is the final destination before the email is accessible to the recipient.
SMTP Commands and Sessions: How They Control Email Flow
- HELO / EHLO: This is how your smtp client says “Hello” to the smtp server. HELO is the older version. EHLO is newer and tells the server your system supports extra features. Example: It helps start a secure smtp session using STARTTLS.
- MAIL FROM: This tells the server who sent the email. It includes the sender’s email address. It’s like writing your name on a letter before dropping it in the mailbox.
- RCPT TO: This command says who should receive the email. It points to the recipient’s email address. You can add more than one receiver using this command multiple times.
- RSET: This command resets the session. It clears all email data if something goes wrong. Think of it as hitting the “reset” button when your form is messed up.
- DATA: Now the server is ready to get the message. Everything after DATA is your email content, including subject and body. The message ends with a line that has only a dot (.). This part is formatted using MIME (Multipurpose Internet Mail Extensions) so your email can include text, images, or files.
- QUIT: This command says, “Goodbye.” It closes the smtp connection. After this, the email heads off to the receiving smtp server.
- SMTP AUTH: This command checks if the sender is allowed to use the smtp server. It’s like a password check. Helps fight spam and fake senders.
- VRFY: Used to verify if an email address is valid. Most public email servers disable this for privacy reasons. It’s still used in secure smtp setups managed by server administrators.
- STARTTLS: This command starts encryption. It makes the session secure using Transport Layer Security. Keeps your email safe while traveling across tcp connections.
- EXPN: This checks if a group address (like a mailing list) is real. It returns all addresses in that list. Just like VRFY, it’s often turned off for security.
- AUTH: Used to log in before sending mail. Works with SMTP AUTH Extension. It’s a must for most cloud based smtp services and email service providers.
- NOOP: NOOP stands for “No Operation.” It’s a command that doesn’t ask the server to do anything important. It usually replies with “250 OK,” which means, “Got it, connection’s still open.”
- HELP: HELP is like asking the smtp server, “What commands do you support?”. It helps in configuring your own smtp server or troubleshooting issues with a cloud based smtp service. Sometimes includes notes, like whether smtp authentication is required or if secure smtp options are available.
There are also other SMTP commands used for advanced authentication, security, and email handling functions beyond those listed above.
The Core Players: SMTP Client, Mail Server, and Mail Transfer Agent
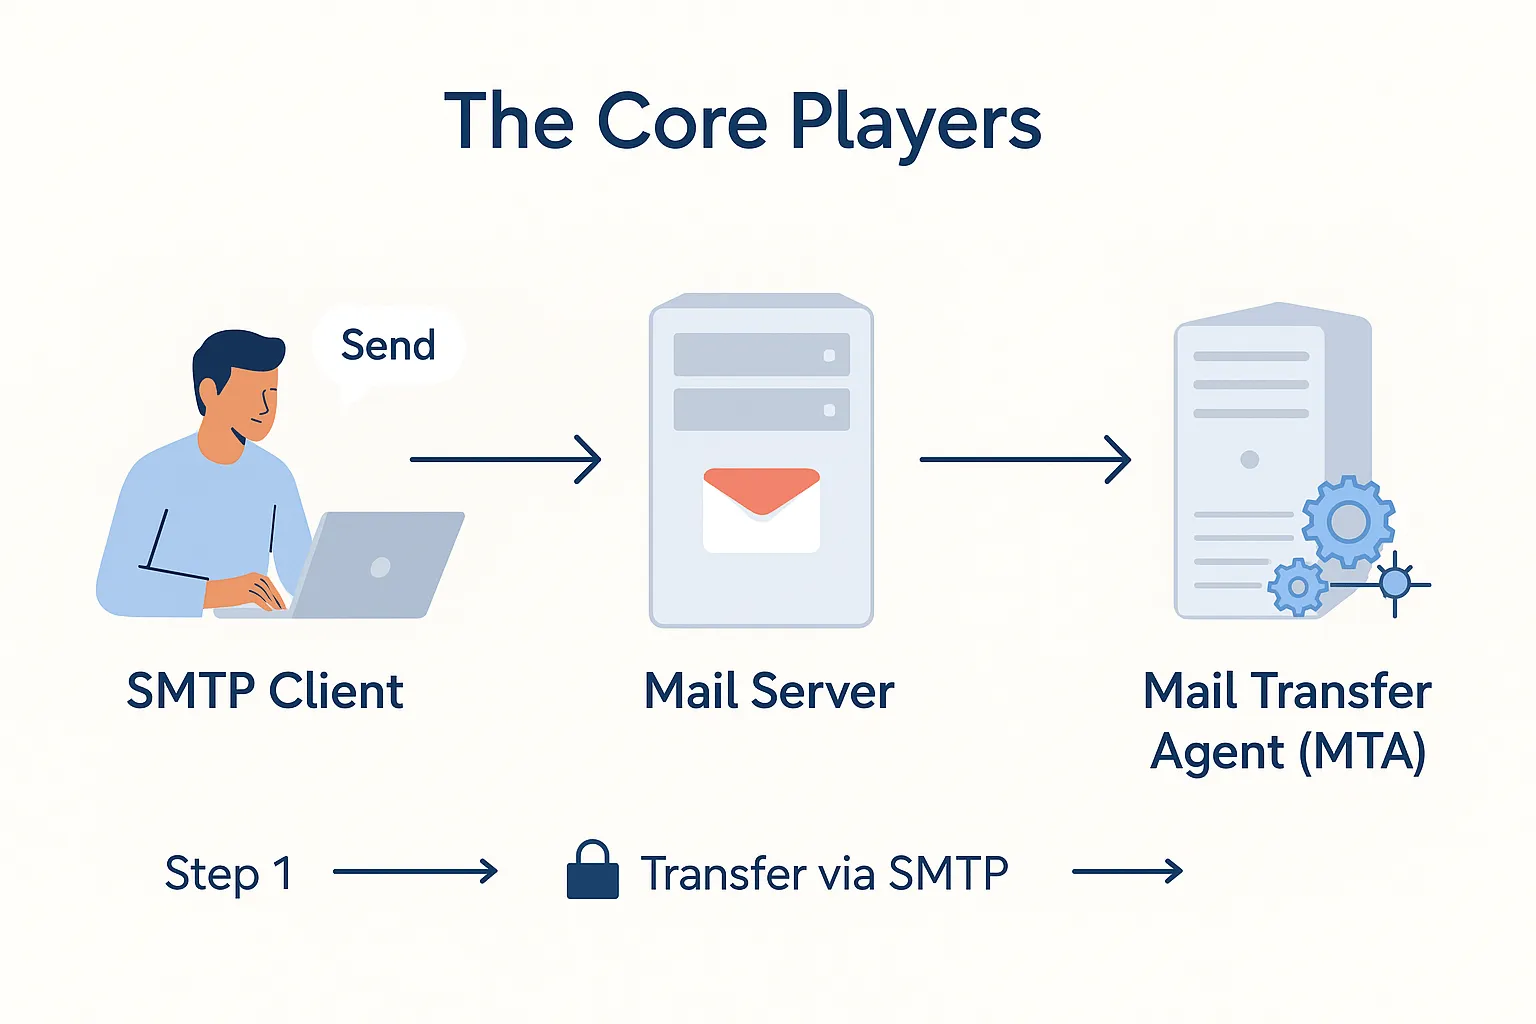
1. SMTP Client: The Sender’s Tool
The SMTP client is the app or tool that sends your email. It could be Gmail, Outlook, or any other smtp email service.
How it works:
- When you send mail, the SMTP client creates the message.
- It connects to the outgoing mail server using the smtp protocol.
- It sends commands like MAIL FROM and RCPT TO to tell the server where the message should go.
2. Mail Server: The Middleman
The mail server is like a post office for your emails. It helps receive and deliver messages.
How it works:
- It uses smtp server software to process outgoing messages.
- The server holds your message until it's ready to go.
- Sometimes, it also checks if you're allowed to send messages using smtp authentication.
3. Mail Transfer Agent (MTA): The Router
The mail transfer agent (like Postfix or Sendmail) finds the best route to get your message to the recipient’s mail server using the transmission control protocol. Message transfer agents handle routing behind the scenes, choosing the best path to deliver your email.
How it works:
- It looks up the domain name system (DNS) to find where the message should go by querying DNS records to locate the recipient's domain and its associated mail server.
- It talks to the receiving smtp server and sends your message using tcp connection.
- The MTA also helps with email delivery and can work with a cloud based smtp service if needed.
How They Work Together
Here’s the full email journey in short:
- You (the sender) write a message using an email client.
- The smtp client sends the message to the mail server.
- The mail transfer agent figures out the recipient's smtp server.
- It delivers the message securely.
- Finally, it lands in the recipient’s inbox via the email server.
- SMTP manages message transfer between servers, making sure your email reaches the right place.
SMTP Authentication and Security Protocols
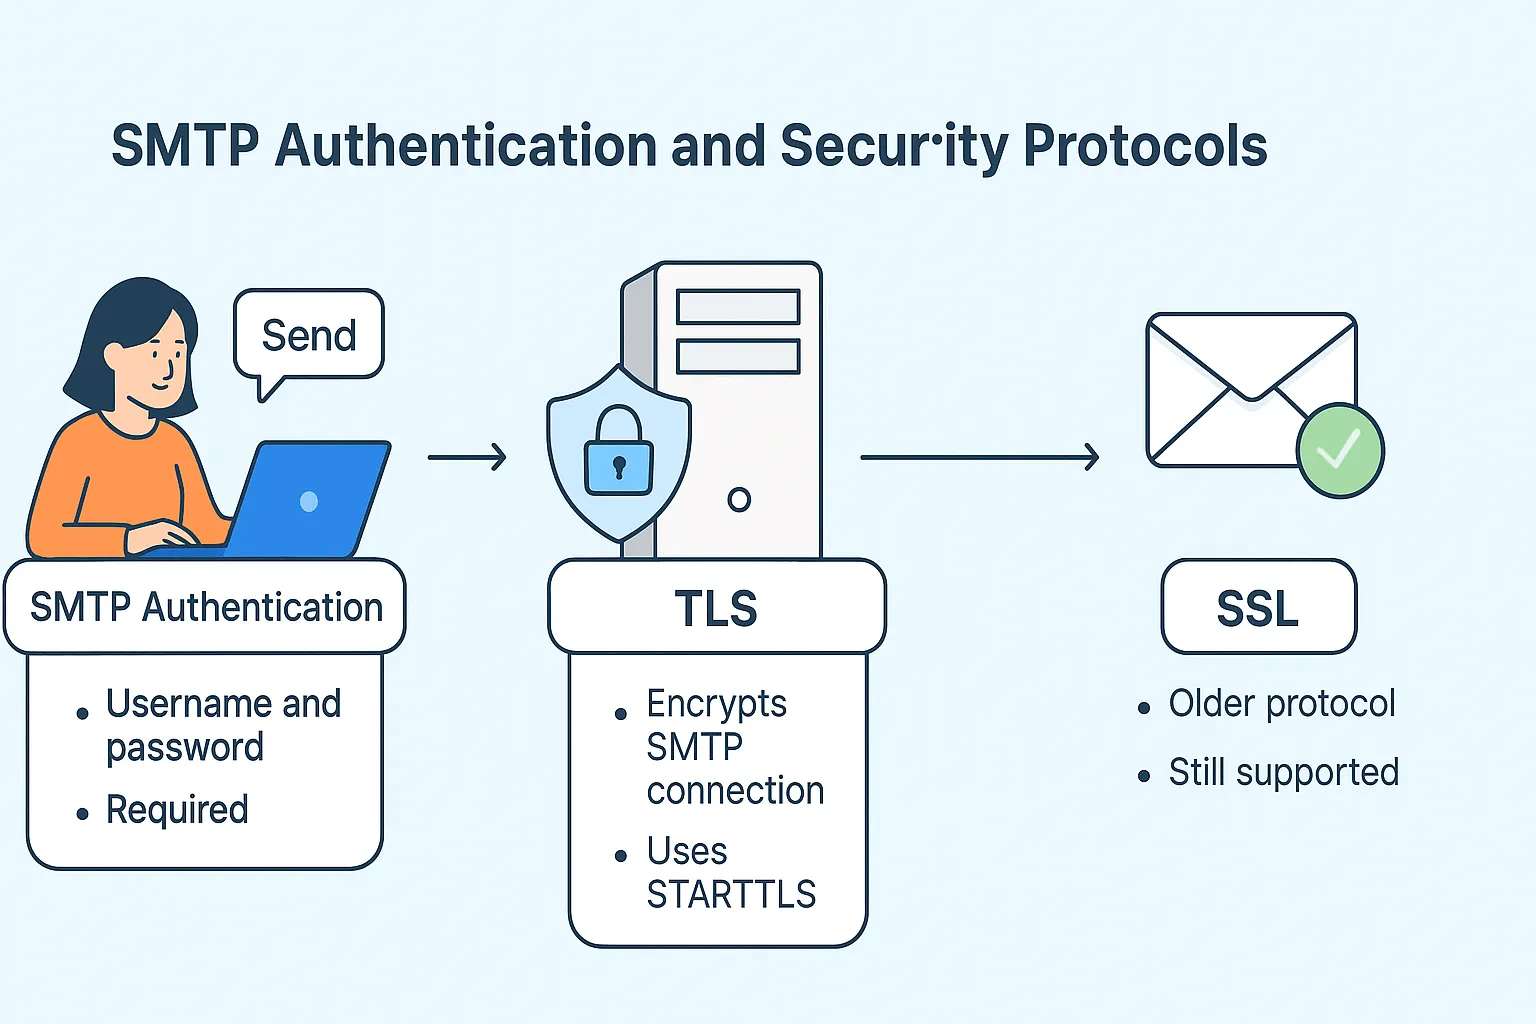
What Is SMTP Authentication?
SMTP authentication (or SMTP AUTH) is a way to prove you’re allowed to send mail through a smtp server.
- You use a username and password to log in.
- This keeps bad actors from sending mail from your account.
- It’s required by almost every email service provider today.
Without it, your email delivery might fail—or worse, your emails could be marked as spam.
Key Security Protocols That Work with SMTP
To make your email secure, SMTP works with special protocols that ensure smtp security and protect your data during the smtp session.
- STARTTLS
- Upgrades a regular smtp connection to an encrypted one.
- Uses Transport Layer Security (TLS) to keep your email safe in transit.
- SSL (Secure Sockets Layer)
- An older method, still used by some smtp servers and cloud based smtp services.
- Port 465 is commonly used for SSL encryption to secure SMTP email transmissions.
- Less common now, but still part of the secure smtp setup.
- SMTP AUTH Extension
- Adds more login methods (like OAuth).
- Used by advanced smtp server software to manage secure logins.
How to Set Up Your Own SMTP Server: A Practical Guide
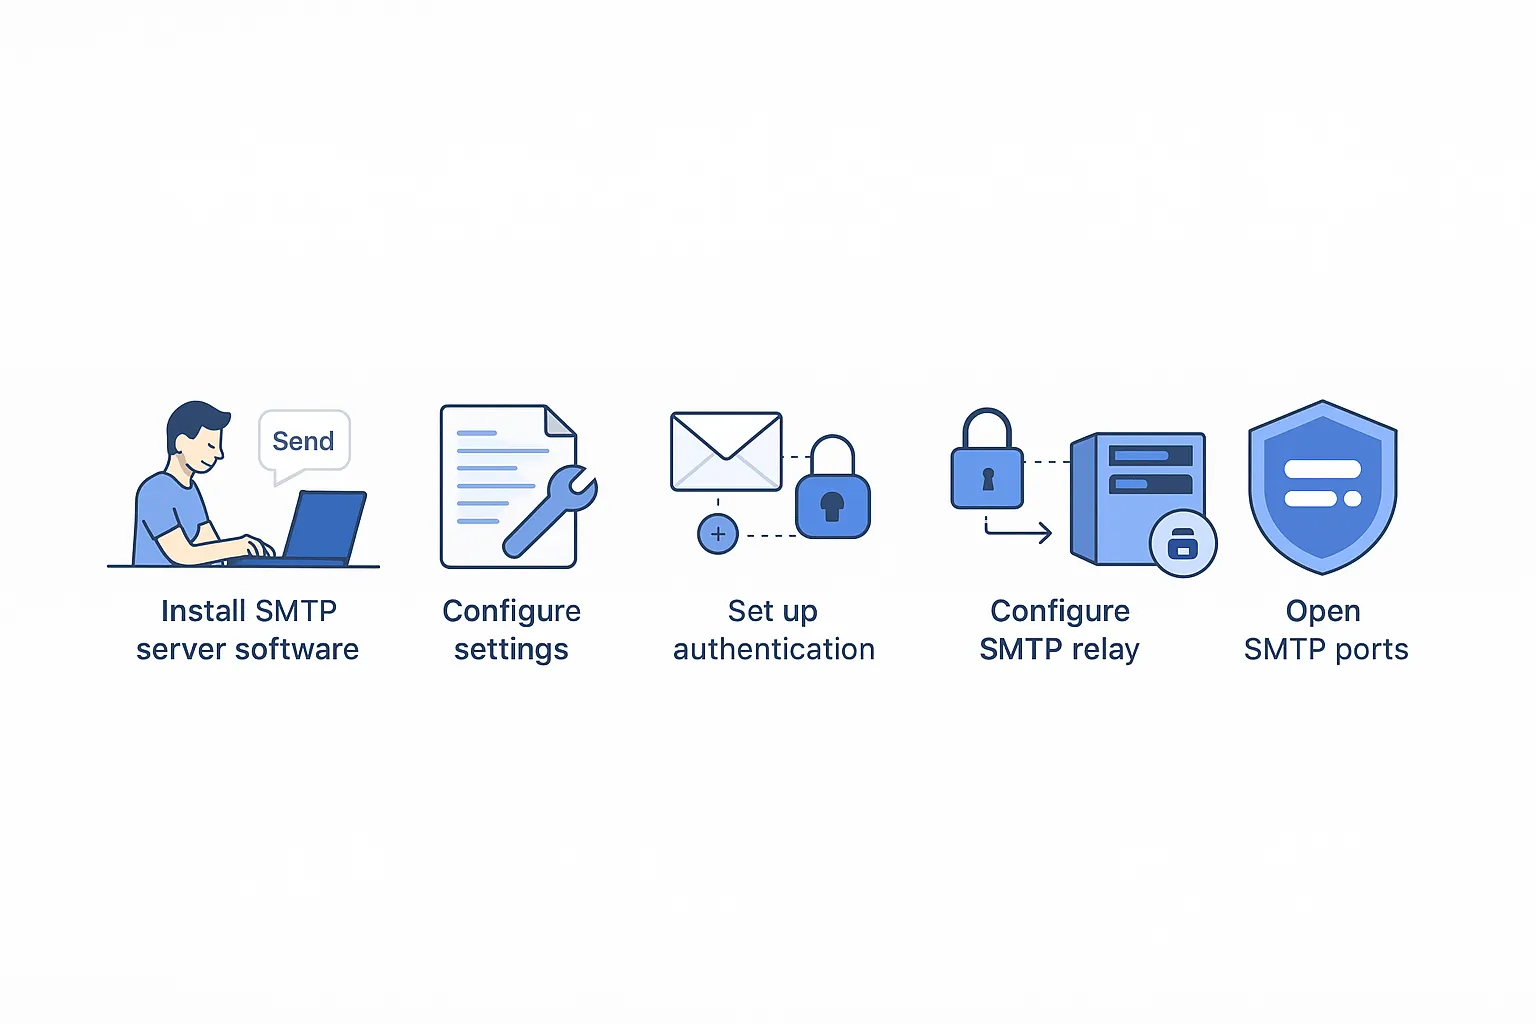
1. Install SMTP server software
First, you need software to send mail. This software is called an SMTP server software.
- Popular choices are Postfix, Exim, or Sendmail.
- These tools act as your mail transfer agent (MTA). That means they send your emails to the recipient’s mail server.
- Choose software based on your operating system. Linux users love Postfix.
Example: If you're using Ubuntu, you can type this in the terminal: sudo apt install postfix
2. Configure main.cf or equivalent file
Once installed, you need to configure the settings. This file tells your SMTP server how to work.
- The file is usually called main.cf (in Postfix) or something similar.
- You’ll add your domain name, hostname, and ports.
- Don’t forget to set your official SMTP port (usually 25, 465, or 587).
- This also defines how your server connects to other mail servers.
Tip: Always test your configuration. You can use tools that check if your smtp connection works.
3. Set up SMTP authentication to prevent unauthorized access
Now, lock it down. Without security, anyone could use your server to send spam.
- Set up SMTP authentication (also called smtp auth extension).
- It makes sure only you or trusted users can send emails.
- Most systems use Transport Layer Security (TLS) or Secure Sockets Layer (SSL) to protect your email sending process.
- This improves email deliverability and protects your reputation.
Bonus: A secure SMTP setup also keeps your data safe.
4. Enable TLS encryption for a secure SMTP connection
When your email travels from one server to another, it can be read by someone if not protected. That’s where Transport Layer Security (TLS) helps. It scrambles the email while it’s being sent, making it harder to steal or tamper with.
To enable a secure SMTP connection:
- Make sure your SMTP server software supports TLS.
- Enable the STARTTLS command in your settings.
- Use a valid SSL/TLS certificate (you can get one for free from Let’s Encrypt).
- Double-check that the smtp session uses TLS when the client sends email.
Tip: Without TLS, your email messages may be blocked by receiving servers or marked as spam.
5. Configure SMTP relay if needed for outgoing mail routing
Let’s say you don’t want your own SMTP server to send emails directly. You can use a SMTP relay to forward them through a trusted third party. This helps when your ISP blocks port 25 or when you're dealing with high volumes.
Why use SMTP relay?
- Avoids email delivery issues.
- Boosts email deliverability using verified routes.
- Adds authentication layers to fight spam.
Steps to set it up:
- Choose a trusted email service provider with a cloud based SMTP service.
- Add the relay host details in your config (like relayhost = smtp.mailprovider.com).
- Make sure your email server has credentials and encryption enabled for the relay.
6. Open the official SMTP port (25, 465, or 587) in your firewall
Your mail server won’t send or receive anything if the ports are blocked. These official SMTP ports let your server talk to others.
Here’s what to open:
- Port 25 – for server-to-server mail transfer.
- Port 465 – used with secure SMTP (SSL).
- Port 587 – best for outgoing email messages from your mail client.
To do this:
- Go to your firewall settings.
- Add rules to allow traffic on ports 25, 465, and 587.
- Test using tools like Telnet to check if they’re working.
Block unused ports to protect from unwanted SMTP traffic or attacks.
7. Add reverse DNS (PTR) and verify IP reputation
To send email safely using your SMTP server, you need to prove that your server is trustworthy. One way is by setting up reverse DNS (PTR record).
- Think of reverse DNS like caller ID for email.
- It links your server IP address to your domain name.
- Email providers like Gmail or Yahoo Mail check this before accepting your message.
If reverse DNS is missing or wrong, your email delivery could fail, or worse—go to spam.
To set it up:
- Ask your internet service provider (ISP) or hosting company to add a PTR record.
- Make sure it matches the domain name system (DNS) settings.
Also, check your IP reputation using tools like:
- Talos Intelligence
- MxToolbox Blacklist Checker
8. Test your email sending process using tools like telnet, sendmail, or online SMTP testers
Once your SMTP connection is live, you need to test it. Why? Even small setup mistakes can break your email sending process.
Here’s how to test it easily:
- Use Telnet to manually send a message and see if your SMTP commands work.
- Try Sendmail from the command line (great for Linux).
- Use online SMTP testers to simulate sending and receiving.
These tests show if your SMTP session, mail transaction, and outgoing mail are working right.
Testing helps you:
- Confirm that the server replies to client sends
- See if your email messages are getting through
- Catch any errors before sending live messages
SMTP Relay, Cloud SMTP Services, and Email Deliverability

SMTP relay helps pass your email from your computer to another mail server. Think of it like mailing a letter—you drop it at the post office, and they handle the delivery.
- SMTP stands for Simple Mail Transfer Protocol. It moves your message from your email client to the recipient's mail server.
- When you use an SMTP relay, your email goes through a trusted third-party server.
- This helps avoid being marked as spam or blocked by the recipient’s email server.
- Big companies or bulk senders often use dedicated SMTP servers or smtp relay services to ensure better email deliverability.
What Are Cloud SMTP Services?
Don’t want to run your own mail server? Use the cloud!
- Cloud based SMTP services are tools like SendGrid, Mailgun, and Amazon SES.
- They handle the smtp server software, smtp authentication, and traffic for you.
- These services help manage smtp traffic, track bounces, and improve delivery.
- They are secure and support features like TLS (transport layer security) and SSL (secure sockets layer).
Why Email Deliverability Matters:
To understand the importance of email in communication, learn about the 10 advantages of email and why it's essential for effective communication.
You worked hard on that email—it should get delivered!
- Email deliverability means your message lands in the right place, not spam.
- Using the same email domain and proper DNS setup improves delivery.
- Avoid spammy content and use smtp commands like EHLO or MAIL FROM correctly.
- Test your email sending process with tools or services before a big campaign.
Outgoing Mail Server vs Incoming Incoming Mail Server: Full Email Flow Explained
Beyond SMTP: How It Works with IMAP, POP, and MIME
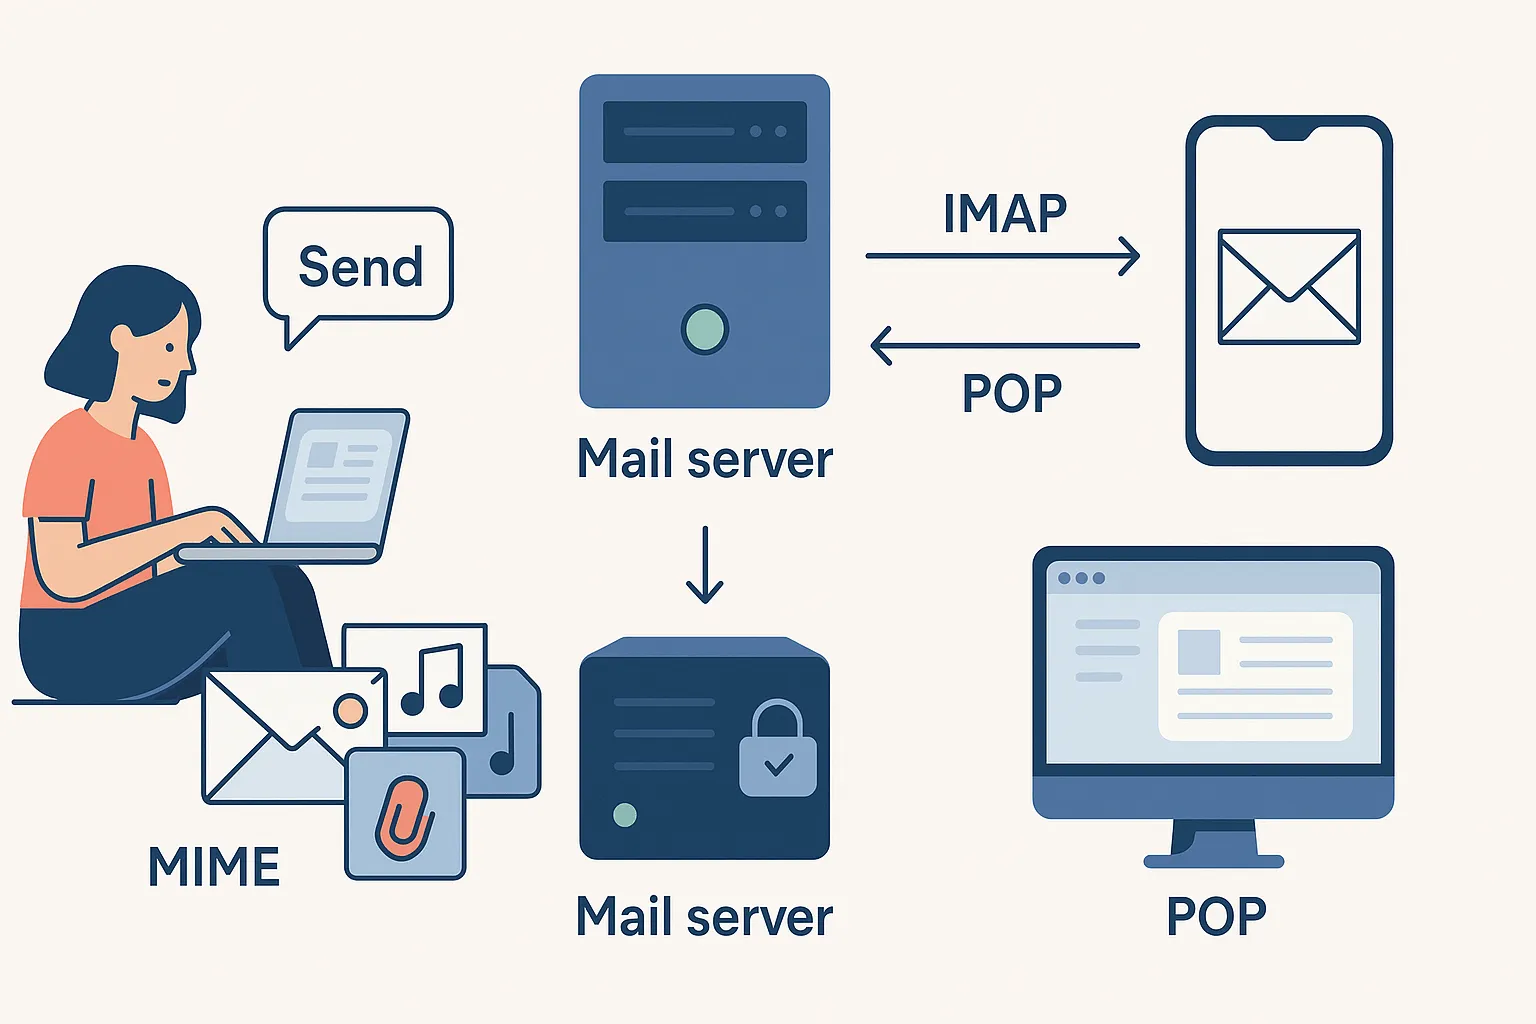
1. IMAP (Internet Message Access Protocol)
IMAP helps you view emails from different devices. If you open your inbox on your phone, laptop, or tablet—it stays in sync. Emails live on the email server, not just your device.
Why it matters:
- Your inbox looks the same everywhere.
- No need to re-download or transfer data manually.
- Works well with cloud-based email systems.
2. POP (Post Office Protocol)
POP is older but still used. It downloads emails from the server to your device. Once that happens, the message may be deleted from the server.
When to use POP:
- You check mail from one device.
- You want messages stored offline.
- Internet access is limited.
3. MIME: Formatting Email Content
MIME (Multipurpose Internet Mail Extensions) lets you send images, attachments, emojis, and more. Without it, emails would be plain text only.
Why MIME matters:
- You can send files, videos, and styled text.
- It helps your email client understand how to display content.
- It supports rich formatting like bullet points and links.
How They Work Together in the Email Ecosystem
Here’s how it all fits:
- SMTP sends your email.
- MIME formats it.
- POP or IMAP helps retrieve it.
- Your mail client reads it.
Every part plays a role in the email sending process. Without one, the message can get lost or display poorly.
FAQs: SMTP in Everyday Use
1. Why Can’t I Send Mail to the Same Email Domain?
Sometimes, when you try to send an email to someone at your own domain (like you@example.com to support@example.com), it doesn’t go through. Why?
- Your smtp server might block same email domain messages to avoid spam loops.
- A mail server misconfiguration could send it to the wrong folder or reject it completely.
- Fix: Make sure your smtp authentication is turned on and your email server is not blocking local traffic.
Tip: Talk to your server administrators or IT team if you keep facing this.
2. How to Use SMTP for Yahoo Mail or with Other Email Service Providers?
Using Yahoo Mail or other services to reach a recipient's domain ? You still need an smtp client to send messages.
- Yahoo uses secure smtp settings.
- Use the correct official smtp port (like 465 or 587). Always check your SMTP email server address—using the wrong one can break your entire email flow.
- Make sure your smtp connection is secured with TLS (transport layer security) or SSL (secure sockets layer).
Each email service provider has its own smtp server address and login rules. Always double-check them.
3. What Causes Email Delivery to Fail Even When SMTP Settings Are Correct?
You set up everything right, but the email still doesn’t land?
- The recipient’s mail server might block your message.
- Your email deliverability score could be low (e.g., flagged as spam).
- Some smtp traffic gets filtered by internet service providers.
To improve this:
- Use smtp auth extension
- Avoid spammy subject lines
- Check your email sending process regularly
4. What’s the Difference Between an Email Server and an SMTP Server?
It’s easy to get confused. Let’s break it down:
- An email server does everything—send, receive, and store email messages.
- An smtp server only helps send messages out.
- Think of smtp as the mail truck, and the email server as the whole post office.
5. What is the difference between HTTP and SMTP?
Good question! These are two different protocols:
- SMTP (Simple Mail Transfer Protocol) sends outgoing email messages.
- HTTP is used for websites, like browsing or streaming.
SMTP = sending mail
HTTP = loading websites
Both use a tcp connection to talk to other computers, but their jobs are totally different.
Conclusion
SMTP is the engine behind your emails, but it's not alone. Tools like a mail submission agent and a mail delivery agent help move your message. Still confused? Think of the smtp email server as the post office, and the smtp work, which includes the helo command, as how the mail moves. Want better email delivery? Use the right smtp server address and test settings often.