
.svg)
.svg)
.svg)
If you’ve ever tried to move your website and ended up in a maze of broken links, you’re not alone. Setting up a Google Domains redirect might sound techy, but it’s actually pretty simple once you know where to click.
According to Ahrefs, nearly 66% of websites lose traffic during domain changes because of mismanaged redirects — and that’s totally avoidable.
This guide walks you through everything — from path forwarding and naked domains to choosing the right redirect type — so your visitors and search engines always land exactly where they should.
Ready to fix your redirects and save your rankings? Let’s do it.
What is a Google Domains Redirect?
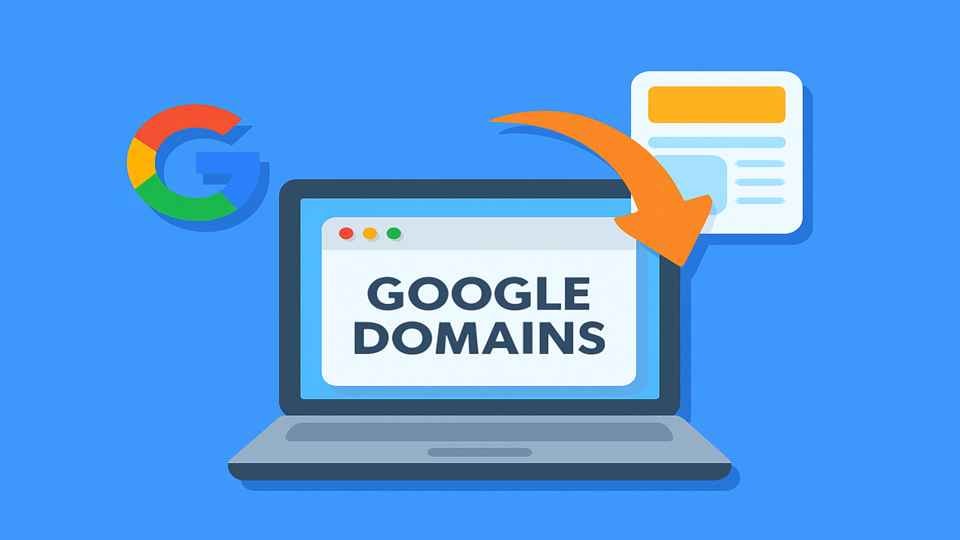
A Google Domains redirect lets you send people from one URL or domain name to another without losing traffic or SEO value.
You can create redirects inside Google Domains using tools like path forwarding, web forwarding synthetic record, or by adding DNS records. These settings make it easy to redirect an old URL to a new domain, forward your subdomain, or handle https requests securely with SSL.
Why redirects are important for search engines, SEO, and user experience
- Protects your rankings: A permanent redirect (301) tells search engines that your website has permanently moved to a new location, keeping your SEO strength.
- Prevents broken links: Visitors won’t land on “Page Not Found” errors.
- Boosts user trust: With https redirects, users always reach a secure and consistent site.
- Helps faster indexing: Google quickly updates your new destination URL in its results.
Fun fact: According to Backlinko, proper domain forwarding can help retain up to 95% of your SEO value during a site move.
Why Google Domains makes domain forwarding simple
- You don’t need coding skills — just sign in, click edit, add your forward domain, and click forward.
- The platform automatically creates synthetic records and handles dns servers for you.
- You can use advanced options like select SSL or path forwarding to customize redirects.
- Works for any main domain, subdomain, or new URL in a few clicks.
In short — Google Domains makes redirecting easy, secure, and fast. It’s built for anyone who wants their redirects to work smoothly without breaking their website or confusing search engines.
Understanding Redirect Types in Google Domains
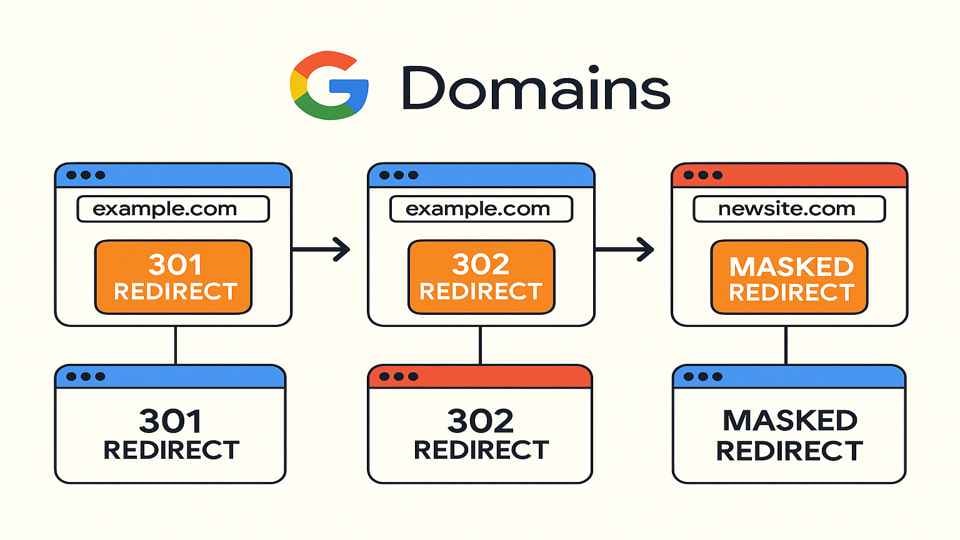
- Permanent Redirect (301 Redirect): A permanent redirect (also called a 301 redirect) tells search engines that your page or website has permanently moved to a new location.
- It helps keep your SEO ranking and passes link value to the new domain.
- Ideal when you change your domain name or migrate to a new website.
- You can set it up in Google Domains by editing your DNS records or adding a web forwarding synthetic record.
- Temporary Redirect (302 Redirect): A temporary redirect tells search engines your move is not forever. It keeps your original URL in search results while sending users to a new domain for a short time.
- It’s useful for testing pages or running a short campaign.
- You can later remove or switch it to a permanent redirect.
- Path Forwarding (Advanced Redirect): Path forwarding sends every page from your old URL to the same page on your new domain.
For example:
example.com/blog → newdomain.com/blog- It saves time and prevents missing pages.
- This feature can be turned on easily under advanced options in Google Domains.
- Web Forwarding Synthetic Record: This type is built directly into Google Domains. It handles domain forwarding for you automatically.
- You don’t need to edit dns servers or write code.
- It also supports https requests, select SSL, and forwarding address for different subdomains.
- Meta Refresh Redirect: This redirect is added inside a webpage, not at the DNS level. It uses a short delay before sending users to the destination URL.
- Example: “This page has moved. You’ll be redirected in 3 seconds.”
- It’s simple but not great for SEO since search engines prefer 301 redirects.
- JavaScript Redirect: A JavaScript redirect runs inside the browser and tells it to go to a new URL using a small script.
- It’s often used in web apps or when redirects depend on user actions.
- However, it’s not ideal for SEO since some search engines may not process it correctly.
- 307 Temporary Redirect: A 307 temporary redirect is like a short-term detour. It tells search engines that your page has moved, but only for now.Use it when: You’re testing new pages or updating your website temporarily without changing your main domain.
- 308 Permanent Redirect: The 308 permanent redirect is the newer version of a 301 permanent redirect.
- It tells search engines that your original URL has permanently moved to a new location.
- It keeps user data (like form entries) and redirects everything securely to your destination URL.
- It’s ideal for https requests or when migrating to a new domain.
- HTTPS Redirect (Auto Upgrade): An HTTPS redirect automatically sends users from an insecure http link to a secure https one.
- This happens automatically in Google Domains when you select SSL or enable web forwarding synthetic record.
- It protects your users and boosts SEO since Google favors secure websites.
- It ensures all https requests reach the right destination URL.
- Subdomain Redirect: A subdomain redirect sends traffic from one part of your domain (like blog.domain.com) to another (like www.domain.com/blog).
- It’s useful for merging content or unifying your main domain under one brand.
- You can set this up easily through your DNS records or forward domain option in Google Domains.
- Naked Domain Redirect: A naked domain is your domain name without “www” (like domain.com). A naked domain redirect ensures users reach your site, even if they don’t type “www.”
- Google Domains handles this automatically through a synthetic record.
- It keeps your redirects consistent and prevents duplicate indexing by search engines.
Step-by-Step Guide: Setting Up a Google Domain Redirect
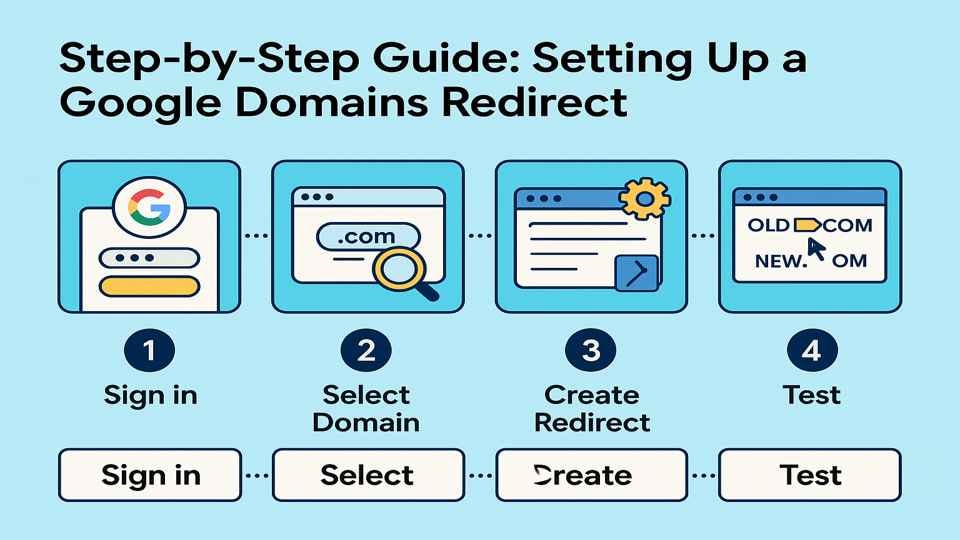
1. Sign in to Google Domains
To start, go to Google Domains and sign in using your Google account.
- You’ll see a list of your domains.
- Choose the primary domain you want to manage.
- This is where you’ll create your redirect.
Tip: Make sure your domain name is active and connected to the right hosting provider before moving forward.
2. Access the DNS Settings
Once inside, click DNS on the left menu.
- This section controls your dns records and dns server settings.
- Scroll down to find Web forwarding synthetic record or Synthetic records.
- Here, you can manage all types of redirects, including permanent redirect (301) and temporary redirect (302).
3. Add a New Web Forwarding Entry
Now click Add synthetic record and choose Web forwarding.
- Enter your destination URL — this is where you want people to go.
- You can redirect your main domain, a subdomain, or even an old URL.
- This process is also called domain forwarding.
Example: If you type oldsite.com, you can forward it to newsite.com.
4. Choose the Redirect Type
Select your redirect type based on what you need:
- Permanent redirect (301): Best for when your site has permanently moved. It passes SEO value to your new location.
- Temporary redirect (302): Use this if your move is short-term or for testing.
These options help search engines understand whether your change is temporary or permanent.
5. Enable Path Forwarding (Optional but Recommended)
If you want every page from your old domain to point to the same path on your new domain, enable path forwarding.
- For example:
- example.com/blog → newdomain.com/blog
- It keeps your site structure clean and helps search engines crawl your website easily.
Pro Tip: You can also select SSL under advanced options to make sure all https requests are secure.
6. Configure HTTPS and SSL Options
Security matters. Turning on HTTPS makes sure every visitor connects to your domain safely.
- Go to Advanced Options in your Google Domains dashboard.
- Turn on Select SSL or Forward with SSL.
- This ensures all https requests are handled securely.
- It also prevents browsers from showing “Not Secure” messages.
Why this helps: Google rewards secure websites with higher rankings, and your users feel safer when they see the little lock icon.
7. Review and Save Your Changes
Before saving, double-check your settings:
- Your destination URL should be correct.
- Make sure the redirect type (301 or 302) matches your goal.
- Confirm path forwarding is turned on if you want to forward all pages.
Once you’re sure, click Save or Click Forward.
This tells Google Domains to create or update your synthetic record for domain forwarding.
Pro Tip: Use simple URLs — for example, avoid typos or unnecessary slashes that might confuse your dns records.
8. Wait for DNS Propagation
After saving, your redirect won’t work instantly.
- Changes need time to spread across dns servers around the world.
- It usually takes 30 minutes to a few hours.
- Don’t panic — this is normal for all redirects and web forwarding setups.
Tip: While waiting, clear your browser cache or test your new domain in incognito mode to see updates sooner.
9. Test Your Redirect
Once it’s active, test your redirect.
- Open your old URL in a browser and check if it redirects to the new location.
- Use free tools like redirect-checker.org to confirm the correct redirect type.
- Make sure both http and https versions of your domain name point to the same website.
If something fails: Check your dns records, forwarding address, and synthetic records in the dashboard.
10. Keep Redirects SEO-Friendly
Once your google domains redirect works, keep it optimized.
- Always use a permanent redirect (301) for domains that have permanently moved.
- Avoid redirect chains — send traffic straight to your new domain.
- Update internal links and sitemaps to your new URL.
- Monitor your search engines performance for any drops.
Common Redirect Mistakes and How to Fix Them
1. Creating Redirect Loops: A redirect loop happens when one URL keeps sending users back to itself.
For example: domain.com → www.domain.com → domain.com again. It confuses browsers and slows down your website. Visitors will see an error instead of your page.
- Double-check your destination URL and dns records in Google Domains.
- Make sure your redirect type points in one clear direction only.
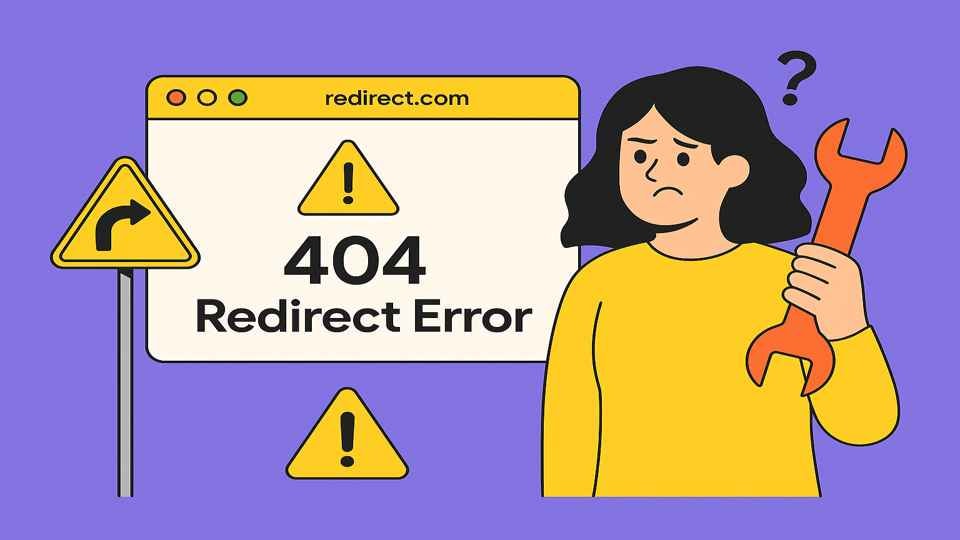
2. Broken or Incorrect Destination URLs: If you enter the wrong destination URL, visitors might land on a blank page or a “404 not found” error. This often happens when you mistype a domain name or forget https in your link.
- Always copy and paste your new URL directly.
- Include “https://” when your select SSL or https requests are enabled.
- Test your redirects before publishing.
3. Not Checking Redirect Propagation: Once you save your redirect, it doesn’t go live instantly. It takes time for dns servers to share the new web forwarding information. This delay is called DNS propagation.
- Wait at least 30 minutes to a few hours.
- Clear your cache or use incognito mode to see the update faster.
4. Overusing Redirect Chains: A redirect chain happens when one page forwards to another, and then another. Example: oldsite.com → middlesite.com → newdomain.com. It slows down your website and hurts SEO.
- Use a single permanent redirect (301) to go directly from your original URL to your new domain.
- Keep your path forwarding clean and simple.
5. Not Testing Redirects After Setup: Many people skip the final check — and that’s risky. A redirect that looks fine in setup might fail in real browsers.
- Open your old URL in a browser and confirm it goes to the new location.
- Use free tools like redirect-checker.org to verify your redirect type (301 or 302).
- Recheck your web forwarding synthetic record if something doesn’t work.
Conclusion
Setting up a Google Domains redirect isn’t complicated — it just needs the right steps. Whether you’re moving to a new domain or creating a permanent redirect, Google Domains makes it simple. You can forwarding google pages safely using built-in tools, even if you’re not a tech expert.
Always check your http and https settings before saving changes to avoid broken links. When Google Domains creates a redirect properly, your visitors never notice the switch — they just reach the right page.