
.svg)
.svg)
.svg)
What is DomainKeys Identified Mail (DKIM)
DomainKeys Identified Mail (DKIM) is a method for authenticating emails, aimed at identifying and preventing the use of falsified sender addresses, a common practice in phishing and email spam.
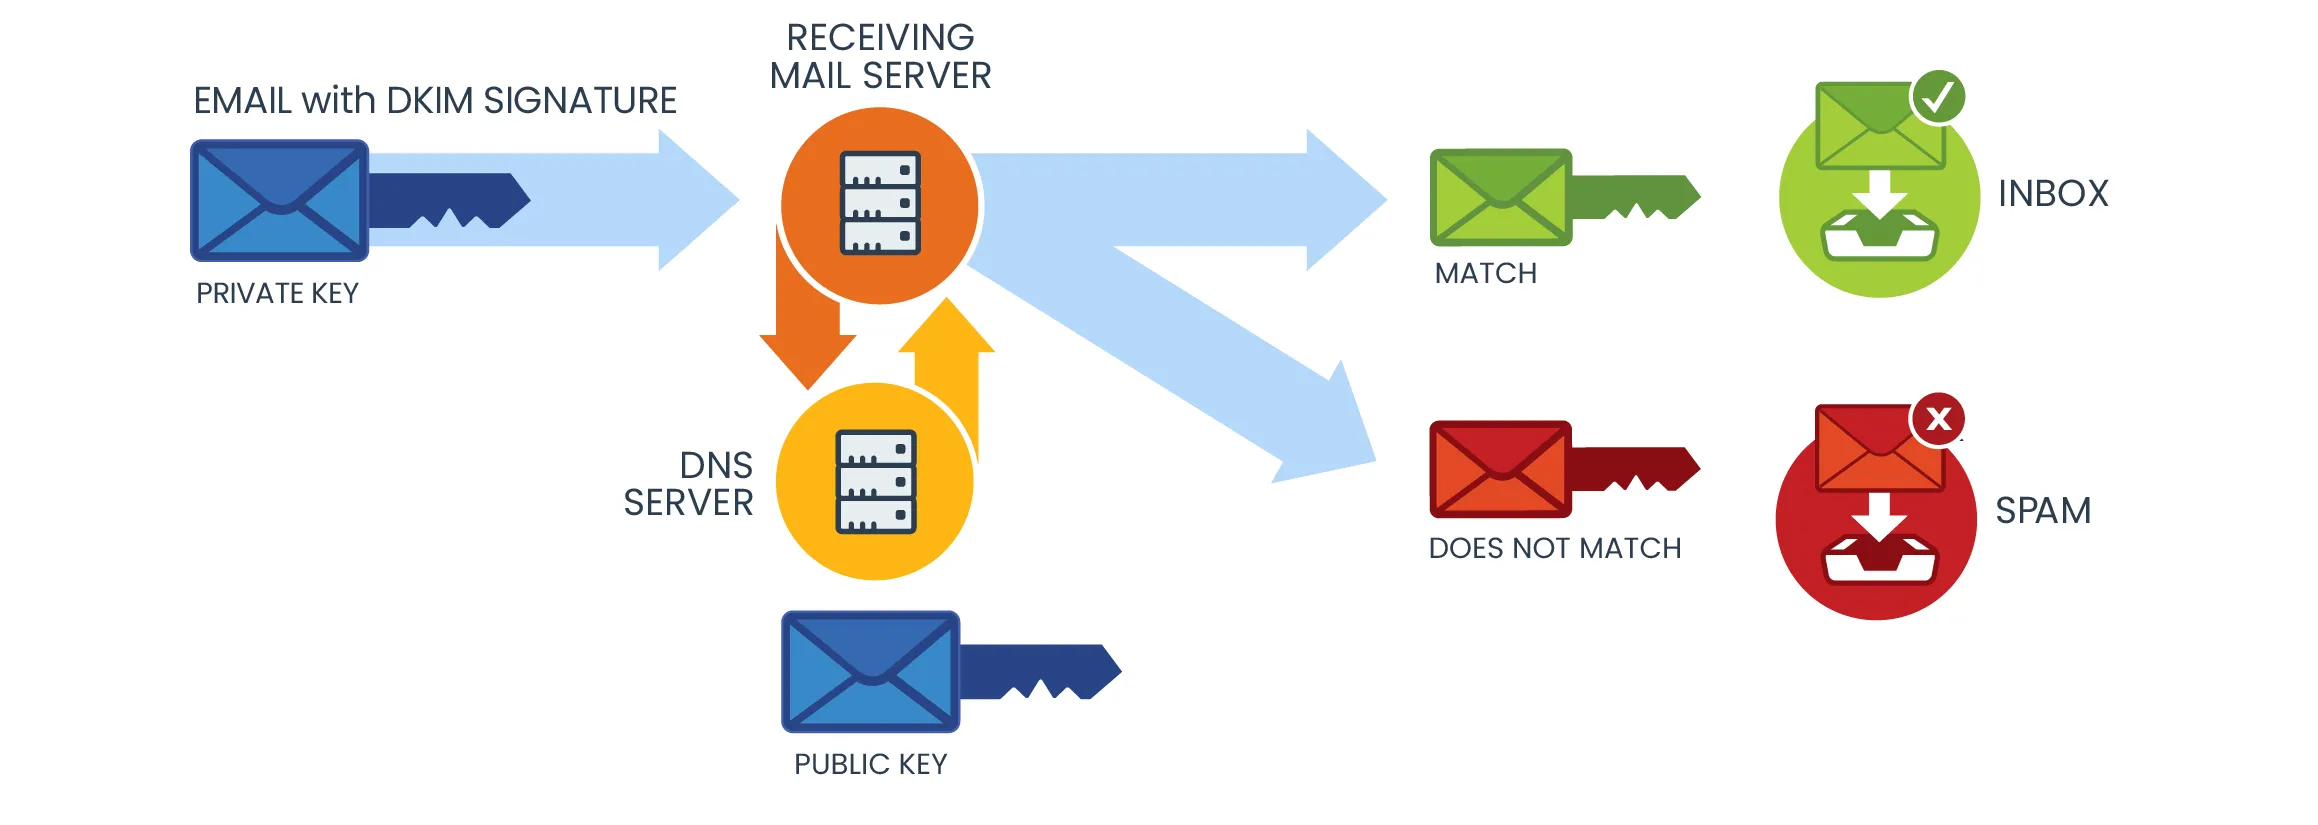
DKIM allows the sender to claim responsibility for a message in a way that can be validated by the recipient. It uses digital signatures to verify if an email message was indeed sent and authorized by the owner of the sending domain.
Key Components of DKIM:
Digital Signature: As an email is dispatched, the sender's outgoing mail server attaches a digital signature using a private key, exclusive to the sender's domain.
Public Key in DNS Record: As an email is dispatched, the sender's outgoing mail server attaches a digital signature using a private key, exclusive to the sender's domain.
Verification Process: Upon receipt of the email, the recipient's mail server fetches the public key from the sender's DNS records. It then uses this key to decrypt the digital signature. This procedure confirms that the email genuinely originates from the domain's owner and ensures it remains unaltered in transit.
Why You Should Enable DKIM in Office 365
Enabling DKIM (DomainKeys Identified Mail) in Office 365 is highly recommended for several important reasons, particularly revolving around email security, sender reputation, and overall email deliverability. Here's why it's beneficial:
1. Enhanced Email Security
- Prevent Email Spoofing: DKIM helps protect your domain from being used in email spoofing, where attackers send emails that appear to be from your domain. By enabling DKIM, you can significantly reduce the likelihood of your domain being used for malicious purposes.
- Verify Email Integrity: DKIM ensures that the content of the email remains unchanged from the point it was sent. This is crucial for preventing interception and alteration of emails.
2. Improved Deliverability and Reduced Spam
- Better Email Deliverability: Emails signed with DKIM signatures are less likely to be flagged as spam by email providers. This is because DKIM provides a way to verify that the email was indeed sent from the domain it claims to be from, and thus is likely to be legitimate.
- Avoiding Junk Folders: Without DKIM, there's a higher chance your legitimate emails could end up in recipients' spam or junk folders, affecting communication and business processes.
3. Enhanced Sender Reputation
- Trust with Email Recipients: DKIM contributes to building a trustworthy reputation for your domain in the eyes of both email recipients and email service providers. A good reputation can improve the open rates and engagement of your emails.
- Compliance with Email Best Practices: Implementing DKIM is considered a best practice in email management. It shows recipients and partners that you are serious about email security.
How DKIM Records Work
Here's a breakdown of how DKIM records function:
1. Creation of a DKIM Record
Key Pair Generation: Initially, a domain administrator generates a cryptographic key pair - a private key and a public key.
DNS Record Creation: The public key is then published in the domain's DNS records as a DKIM record (a type of TXT record). This record also includes additional information like the selector, which is a unique identifier for the key pair.
2. Signing Outgoing Emails
Email Signing: When an email is sent from the domain, the sending server uses the private key to create a digital signature. This signature is based on the content of the email and is included in the email header as the DKIM-Signature field.
Signature Details: The DKIM signature in the email header includes the domain, the selector (identifying which public key to use), and the actual encrypted hash of the email content.
3. Email Reception and Verification
Receiving the Email: Upon arriving at the recipient's mail server, the server reads the DKIM signature in the email header.
Fetching the Public Key: The server performs a DNS query to retrieve the public key. It uses the domain and selector from the DKIM signature to find the correct DKIM record in the sender's DNS.
Decrypting the Signature: The public key is used to decrypt the digital signature and retrieve the hash value of the email as it was sent.
4. Comparing Hashes
Hash Comparison: The recipient server then calculates its own hash of the email and compares it against the decrypted hash from the DKIM signature.
Verification Result: If the hashes match, it verifies that the email was indeed sent by the owner of the domain and that its contents have not been altered in transit. If they don't match, it could indicate tampering or a spoofing attempt.
How DKIM for Office 365 Works with Other Email Authentication Methods
SPF (Sender Policy Framework): While SPF validates the sending mail server, DKIM validates the actual message and remains intact even if the email is forwarded, making it a complementary and more robust method.
DMARC (Domain-based Message Authentication, Reporting, and Conformance): DKIM works in conjunction with DMARC, which leverages both DKIM and SPF. DMARC provides instructions to the receiving mail server on what to do if an email fails the DKIM or SPF checks.
How to Configure DKIM in Office 365

Understanding When to Configure DKIM
- Default Domain (.onmicrosoft.com): If you're using the default .onmicrosoft.com domain, there’s no need to manually configure DKIM as Office 365 uses a default 2048-bit DKIM key.
- Single Custom Domain: For one custom domain, manual configuration isn't typically required.
- Multiple Custom Domains or DMARC: If you have more than one custom domain or wish to set up DMARC, manual DKIM configuration is necessary.
Configuring DKIM in Office 365 (now part of Microsoft 365) is an important step in ensuring email security and integrity. This process involves creating DKIM keys, updating DNS records, and enabling DKIM signing for your emails. Here's an guide on how to do it:
Prerequisites
- Ensure you have admin access to both your Office 365 Exchange admin center and your domain's DNS management console.
- Your domain should be added and verified in Office 365.
Step 1: Generate DKIM Keys
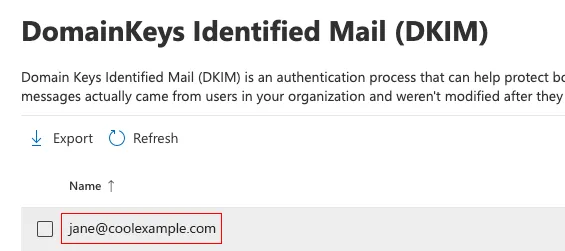
1. Sign in to the Microsoft 365 Defender Portal. Use your Microsoft 365 email address and password
2. Under DomainKeys Identified Mail (DKIM), select your domain name. (Make sure to select the domain name itself, and not the checkbox next to it.) A window will open on the rightmost side.
Office 365 automatically generates DKIM keys of your custom Domain's DNS Records. You don't need to manually create these keys.
Office 365 creates two CNAME records for each domain. These records are used to publish your DKIM public keys.
4. You can now toggle the “Enable button” to start the activation process for DKIM. A dialogue box will appear which may contain the following status:
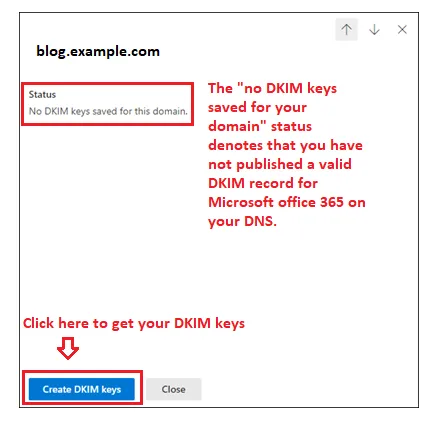
5. To view your keys, just click the Create DKIM keys button.
6. You can now see your DKIM CNAME records in a pop-up window.
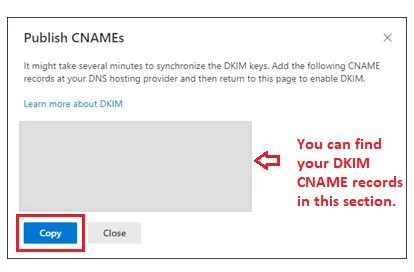
7. Click on the blue “Copy” button to copy records to your clipboard
Step 2: Publish DKIM Keys in DNS
Locate DKIM CNAME Records:
- In Office 365, go to the Exchange admin center.
- Navigate to Protection -> dkim.
- Select the domain and find the CNAME records for DKIM. They typically look like selector1._domainkey.yourdomain.com and selector2._domainkey.yourdomain.com.
Update DNS Records:
- Log into your DNS hosting provider’s control panel.
- Add the provided CNAME records to your domain’s DNS settings. This associates the DKIM public keys with your domain.
- Using the space provided on the Defender interface, paste the copied hostnames and values.
- Retain TTL at 3600.
- Note: DNS record updates may take some time to propagate.
Step 3: Enable DKIM Signatures for Your Domain
Enable DKIM in Office 365
- In the Exchange admin center under dkim, select the domain and enable DKIM signing.
- This action instructs Office 365 to sign outgoing emails from your domain with DKIM.
Verification
- To verify that DKIM is working, send a test email from your domain to an external email address.
- Inspect the email header of the received message for a DKIM signature that mentions your domain from dkim record test.
Additional Considerations
- Multiple Domains: If you have multiple domains in Office 365, you’ll need to repeat these steps for each domain.
- Regular Key Rotation: Office 365 automatically rotates DKIM keys periodically for added security.
- Troubleshooting: If you encounter issues, double-check the DNS records for accuracy and ensure they’ve had time to propagate. Also, verify that your domain is correctly set up in Office 365.
How to Configure and Enable DKIM using PowerShell?

If you're managing several domains within your tenant and need to enable DKIM, PowerShell can be a highly efficient tool.
PowerShell allows you to generate DKIM records for all the domains in your tenant. After setting up the necessary CNAME records, you can then easily activate DKIM using PowerShell commands
Prerequisites:
- Admin Access: Ensure you have administrative privileges for your Office 365 account.
- Install and Connect to Exchange Online PowerShell: You need to be connected to Exchange Online PowerShell. If you haven't done this before, you can find instructions on Microsoft's official documentation.
Step-by-Step Configuration and Enabling of DKIM using PowerShell
Step 1: Connect to Exchange Online PowerShell
- Open PowerShell as an administrator.
- Run the following command to connect to Exchange Online:
- Connect-ExchangeOnline -UserPrincipalName <your Office 365 admin account>
Step 2: Generate DKIM Keys for Your Domain
- Before enabling DKIM, you must generate the keys for each domain. Use the following command:
- New-DkimSigningConfig -DomainName "yourdomain.com" -Enabled $true
- Replace "yourdomain.com" with your actual domain name.
- If the keys are already created, the command will notify you.
Step 3: Retrieve DKIM CNAME Records for DNS
- To get the CNAME records you need to add to your DNS, use the following command:
- Get-DkimSigningConfig -Identity "yourdomain.com" | fl Selector1CNAME, Selector2CNAME
- This command provides the CNAME records (Selector1CNAME and Selector2CNAME) that you need to add to your domain's DNS settings.
Step 4: Update DNS Records
- Add the provided CNAME records to your DNS settings at your domain registrar or DNS hosting provider.
- Note: DNS changes might take some time to propagate.
Step 5: Enable DKIM Signing
- After the DNS changes have propagated, enable DKIM signing for your domain using the following command:
- Set-DkimSigningConfig -Identity "yourdomain.com" -Enabled $true
- Again, replace "yourdomain.com" with your actual domain name.
Step 6: Verify DKIM is Enabled
- To confirm that DKIM is enabled, run:
- Get-DkimSigningConfig -Identity "yourdomain.com" | fl Enabled
- This command should return Enabled: True if DKIM is successfully enabled.
Troubleshooting DKIM Issues in Office 365
Understanding Common DKIM Issues in Office 365
- DKIM Signature Not Validating: This occurs when recipient servers cannot validate the DKIM signature of your emails, possibly marking them as spam.
- Incorrect DNS Records: Errors in the DKIM DNS records can prevent proper validation.
- DKIM Keys Not Rotating: Office 365 automatically rotates DKIM keys, but issues can arise if this process fails.
- Configuration Errors: Misconfiguration in the Office 365 DKIM setup can lead to authentication failures.
Step-by-Step Troubleshooting
1. Check DKIM DNS Records
- Verify Record Syntax: Ensure that the DKIM CNAME records in your DNS are correctly formatted. Look for Common mistakes include typos or incorrect domain references in DKIM verification
- Propagation Time: Remember that DNS record updates can take time to propagate. This period can range from a few minutes to 48 hours.
2. Use Online DKIM Validators
- Utilize online tools to validate your DKIM records. These services check if your DKIM DNS records are correctly published and formatted.
3. Review Office 365 DKIM Configuration
- Access the Exchange Admin Center: Check your DKIM configuration in the Office 365 Exchange Admin Center.
- Enable DKIM: Ensure that DKIM is enabled for each domain. Sometimes, toggling DKIM off and on again can resolve issues.
4. Inspect Email Headers
- Send a test email to an external address and inspect the headers of the received email. Look for the DKIM signature (begins with ‘v=DKIM1;’). If missing, it indicates a problem in the DKIM signing process.
5. Check for Key Rotation
- Office 365 should automatically rotate DKIM keys. If you suspect an issue, contact Microsoft Support for assistance.
6. Examine Mail Flow Rules
- In some cases, mail flow rules in Office 365 can alter the email headers or content, invalidating the DKIM signature. Review these rules to ensure they don't interfere with DKIM.
7. Test with Different Recipient Servers
- If DKIM validation issues are reported by recipients using specific email services, test by sending emails to different servers (like Gmail, Yahoo) to isolate the problem.
8. Review SPF and DMARC Records
- While not directly related to DKIM, incorrect SPF or DMARC records can complicate email authentication. Verify these records for proper configuration.
How to Disable DKIM in Office 365
1. Access the Office 365 Admin Center:
- Log in to your Office 365 Admin Center using an account with administrator privileges.
2. Navigate to the Exchange Admin Center:
- Within the Office 365 Admin Center, find and access the Exchange Admin Center (EAC).
3. Go to DKIM Settings:
- In the EAC, navigate to the 'Protection' section, and then select 'dkim'.
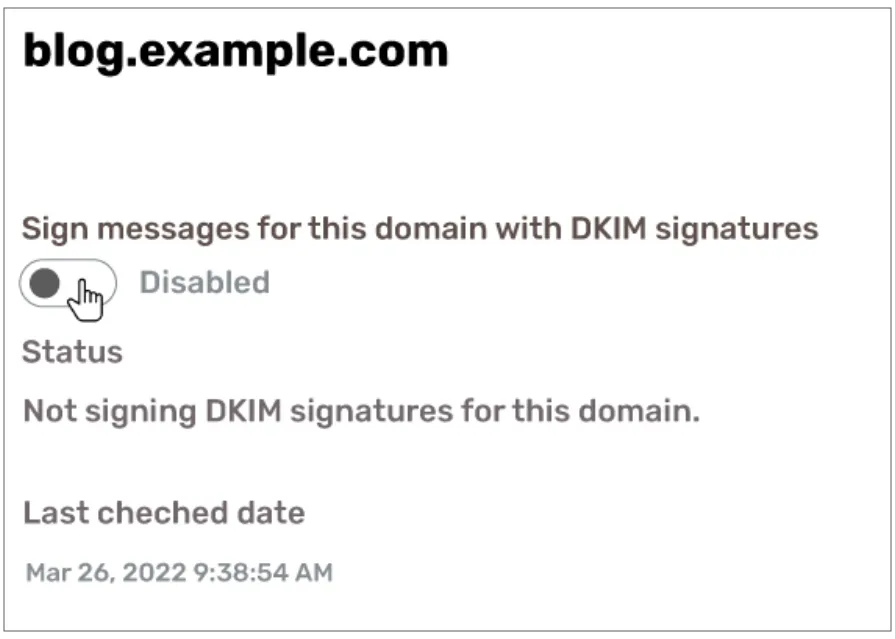
4. Disable DKIM for Your Domain:
- You'll see a list of your domains. For each domain you want to disable DKIM, select it and then click on the option to disable DKIM signing.
- Confirm the action if prompted.
5. DNS Record Update (Optional):
- If you had previously set up CNAME records in your DNS for DKIM, consider removing or updating them. However, this step is optional as disabling DKIM in Office 365 effectively stops the signing of emails, regardless of the DNS settings.
When to Disable DKIM
Disabling DKIM is generally not advised unless it's for specific, temporary reasons. Situations might include:
1. Troubleshooting Email Delivery Issues: If you suspect DKIM configuration errors are causing email delivery problems, you may temporarily disable it to diagnose the issue.
2. Transitioning Between Email Systems: If you're moving to a different email system and need to adjust your DKIM setup, you might disable DKIM in Office 365 during the transition.
3. Updating DKIM Keys or Records: In case of updating or rotating DKIM keys, you might briefly disable DKIM, though this is typically not necessary as newer systems allow key rotation without disabling DKIM.