Introduction to Email Marketing with Amazon SES
What is Amazon SES
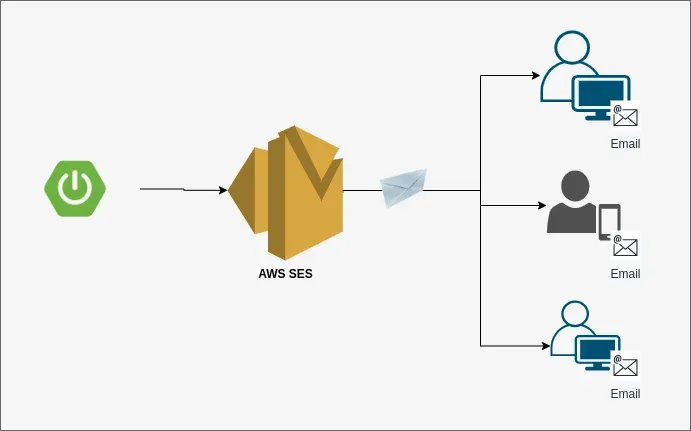
Amazon Simple Email Service (Amazon SES) is a cloud-based email sending service designed to help developers and marketers send marketing, notification, and transactional emails at scale. As part of the Amazon Web Services (AWS) suite, Amazon SES provides a highly reliable, scalable, and cost-effective means for sending email, whether you're sending a few messages a day or millions.
Why Choose Amazon SES for Your Marketing Emails Campaign
Amazon SES stands out for its scalability and high deliverability, making it a strong choice in the transactional email software category listed on Spotsaas. It ensures that your emails reach your customers' inboxes and supports features needed for modern marketing teams.
Here are several reasons to consider Amazon SES for your email marketing needs:
High Deliverability Rates
Amazon SES ensures that your emails land in your recipients' inboxes, not their spam folders. This is crucial for successful email marketing campaigns.
- ISP Relationships: Amazon SES maintains strong relationships with Internet Service Providers (ISPs), enhancing your emails' deliverability.
- IP Management: Offers both shared and dedicated IP options, allowing for better control over sender reputation.
Cost-Effective Solution
With Amazon SES, you can send a vast number of emails at a fraction of the cost of other services, without compromising on quality.
- Pay-as-you-go: You pay only for what you use, with no upfront fees. For example, sending 10,000 emails could cost as little as $1, depending on the region.
- Free Tier: For new users, Amazon SES offers a generous free tier, allowing you to send 62,000 emails per month at no charge when calling Amazon SES from an Amazon EC2 instance.
Scalability
Amazon SES is designed to grow with your business, effortlessly scaling from a few emails to millions daily.
- Automatic Scaling: Adjusts its capacity based on your sending activity, ensuring that your growing marketing needs are always met.
- Flexible Sending Options: Whether through the SES API or SMTP interface, you can integrate SES seamlessly into your application or existing email infrastructure.
Security and Compliance
Security is a top priority for Amazon SES, providing features that protect sensitive data and help you comply with regulations.
- Encryption: Supports TLS encryption, ensuring that data in transit is secure.
- Authentication: Implements Sender Policy Framework (SPF) and DomainKeys Identified Mail (DKIM), reducing the risk of email spoofing and phishing attacks.
Enhanced Engagement through Personalization
Amazon SES supports email personalization, which is key to engaging your audience effectively.
- Customizable Email Templates: Allows for dynamic content and template customization, making it easier to tailor messages to individual preferences.
- Sending Statistics: Offers insights into opens, clicks, bounces, and complaints, enabling you to refine your campaigns for better engagement.
Process of Sending Emails via Amazon SES
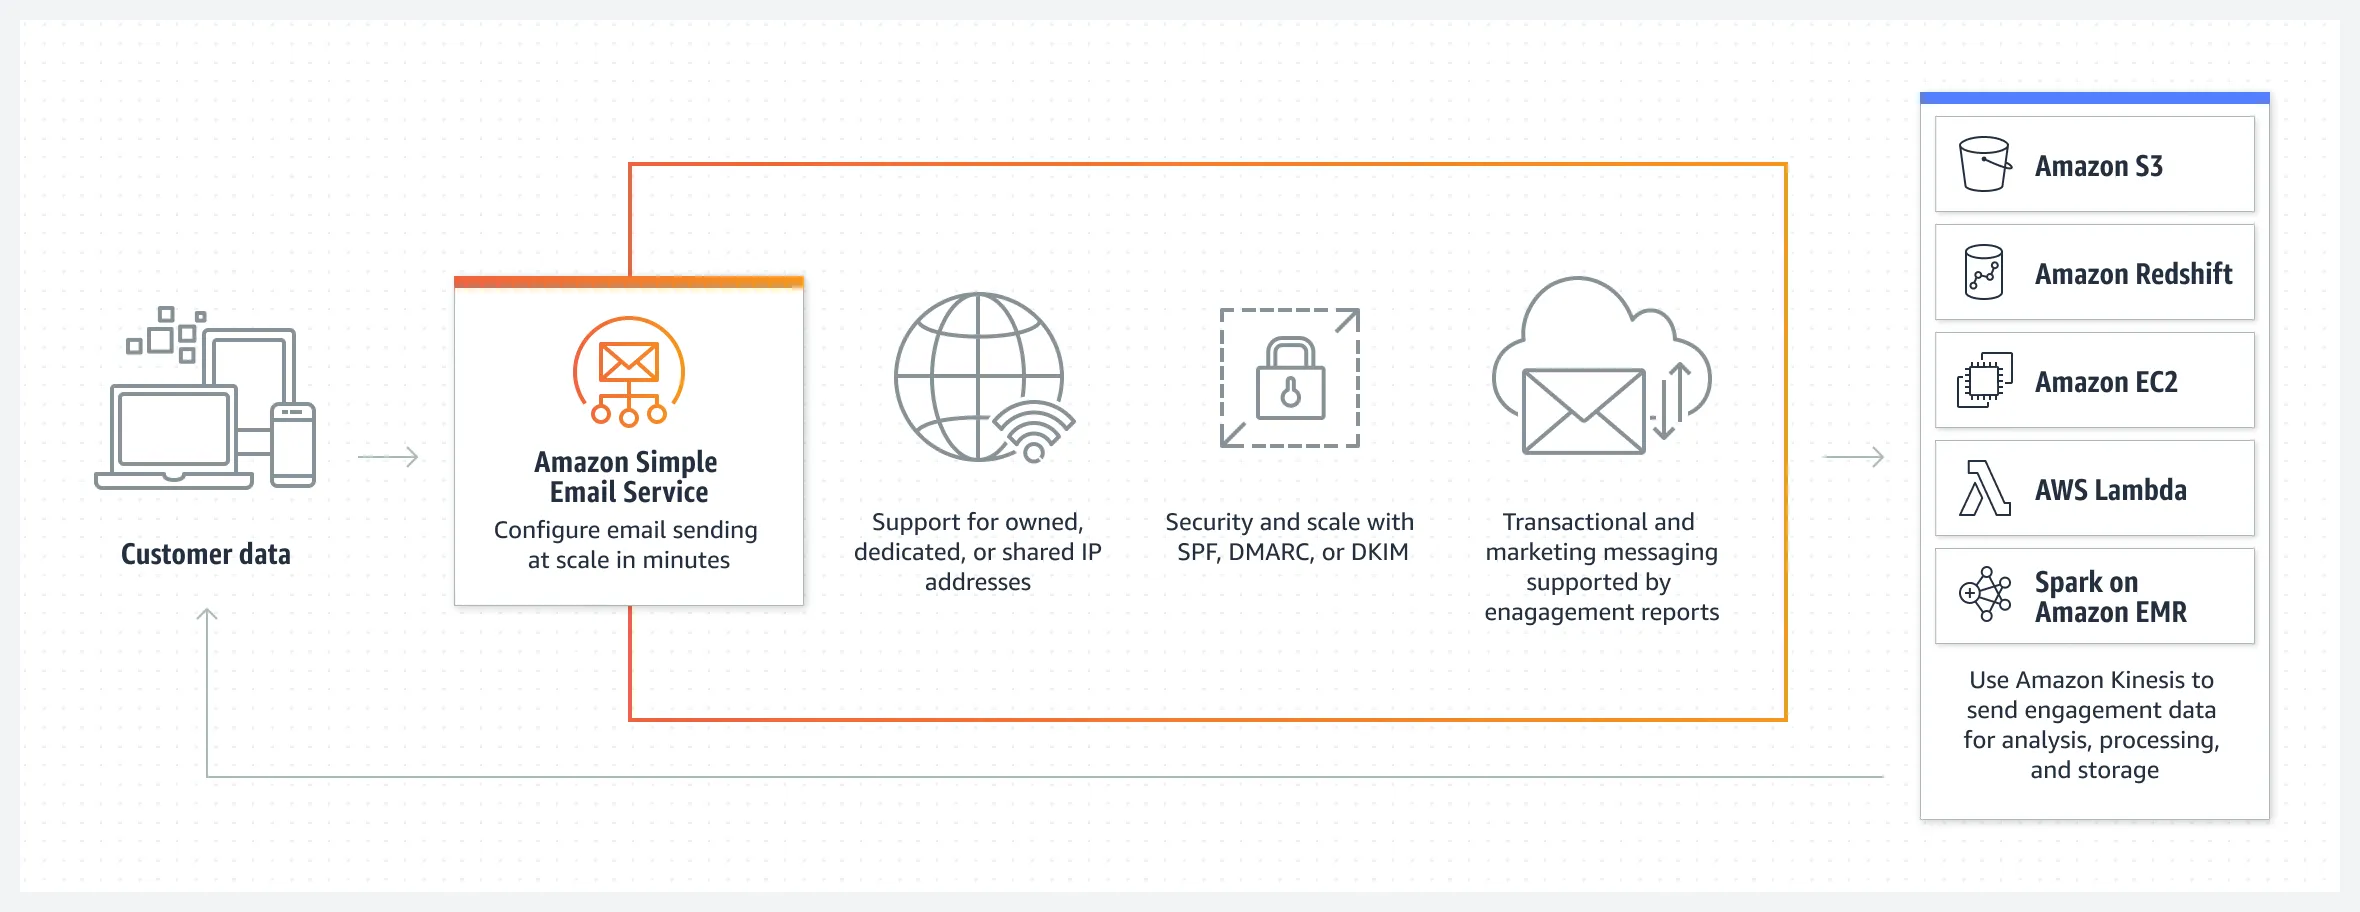
The process of sending emails via Amazon SES is designed to be straightforward yet flexible, catering to various business needs and sizes.
By understanding the core steps involved, organizations can leverage Amazon SES for sending both marketing emails and transactional emails effectively. Here's how the process unfolds:
Getting Started with Amazon SES
1. Create an AWS Account
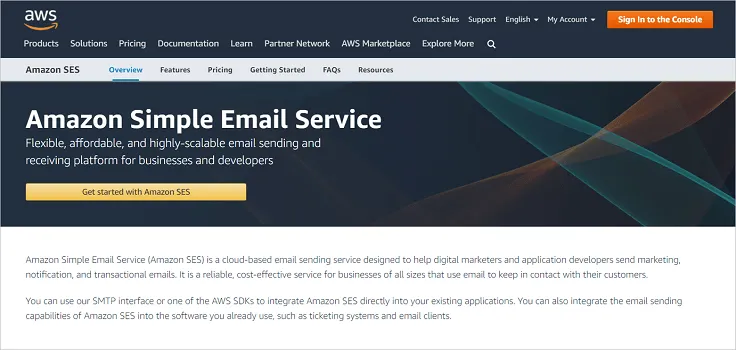
Before you can use Amazon SES, you need an AWS account. If you're new to AWS, you'll be pleased to find that Amazon SES offers a generous free tier, allowing you to send 62,000 emails per month at no cost when you send from an Amazon EC2 instance.
2. Verify Your Email Identity
Amazon SES requires you to verify your email address or domain to ensure that you own it. This step is crucial for preventing abuse and maintaining high deliverability.
- Email Address Verification: Ideal for testing purposes or small-scale email operations.
- Domain Verification: Recommended for larger scale operations, this allows you to send emails from any address associated with your domain.
How You can Verify Your Email Identity
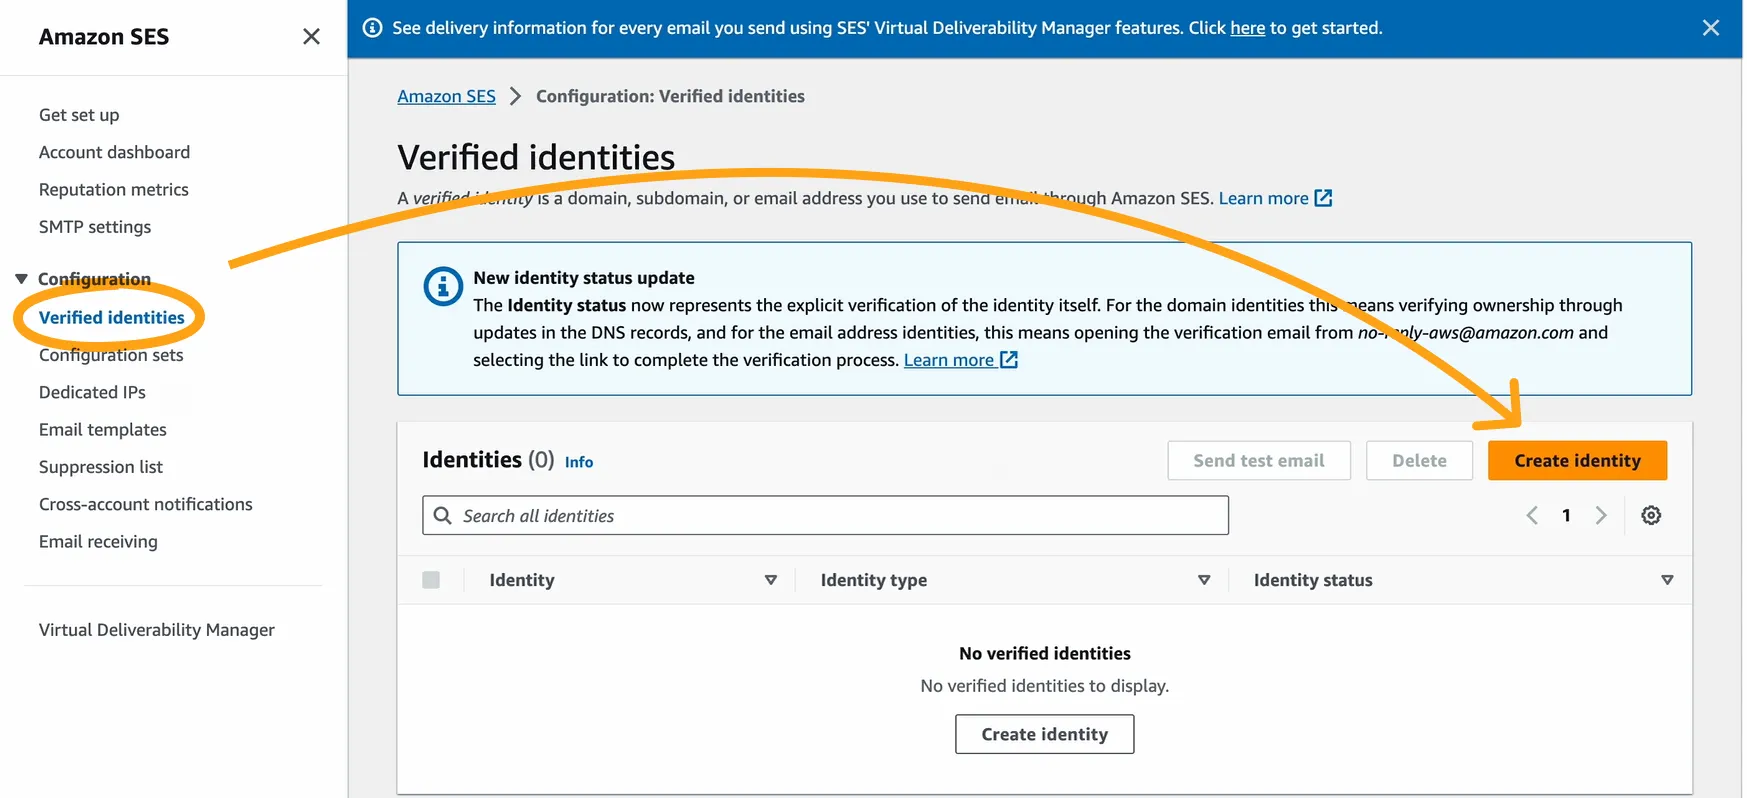
Email Address Verification
- Access the Amazon SES console: Log in to your AWS account and navigate to the Amazon SES console.
- Navigate to Identity Management: Once in the SES console, find the Identity Management section and select "Email Addresses."
- Verify a New Email Address: Click on "Verify a New Email Address" and enter the email address you wish to verify.
- Check Your Inbox: Amazon SES will send an email to the address you provided. This email contains a verification link.
- Complete Verification: Click on the verification link in the email. This completes the verification process for your email address, allowing you to send emails from this address using Amazon SES.
Domain Verification
- Start Domain Verification: In the SES console, under Identity Management, go to "Domains" and click on "Verify a New Domain."
- Enter Your Domain: Type in the domain you wish to verify and optionally enable DKIM settings for added security and authentication.
- Update DNS Records: Amazon SES will provide you with DNS records to add to your domain's DNS settings. These records typically include a TXT record for verification and CNAME records if you're enabling DKIM.
- Verify DNS Updates: It may take some time for DNS changes to propagate. Once they do, Amazon SES automatically verifies your domain, and you'll be able to send emails from any address associated with the verified domain.
Preparing to Send Your Both Marketing and Transactional Emails
Once your account is set up and your identity verified, you're almost ready to start sending emails. Here's what comes next:
3. Choose Your Sending Method
Amazon SES offers two primary methods for sending emails — the SES API and the SMTP interface. Your choice depends on your technical requirements and preferences.
- SES API: Offers direct integration with your applications for sending email programmatically. This method is ideal for developers looking for custom solutions.
- SMTP Interface: A great option for integrating with existing email clients or applications that support SMTP, making it straightforward to switch to Amazon SES without significant changes to your application.
4. Request Production Access
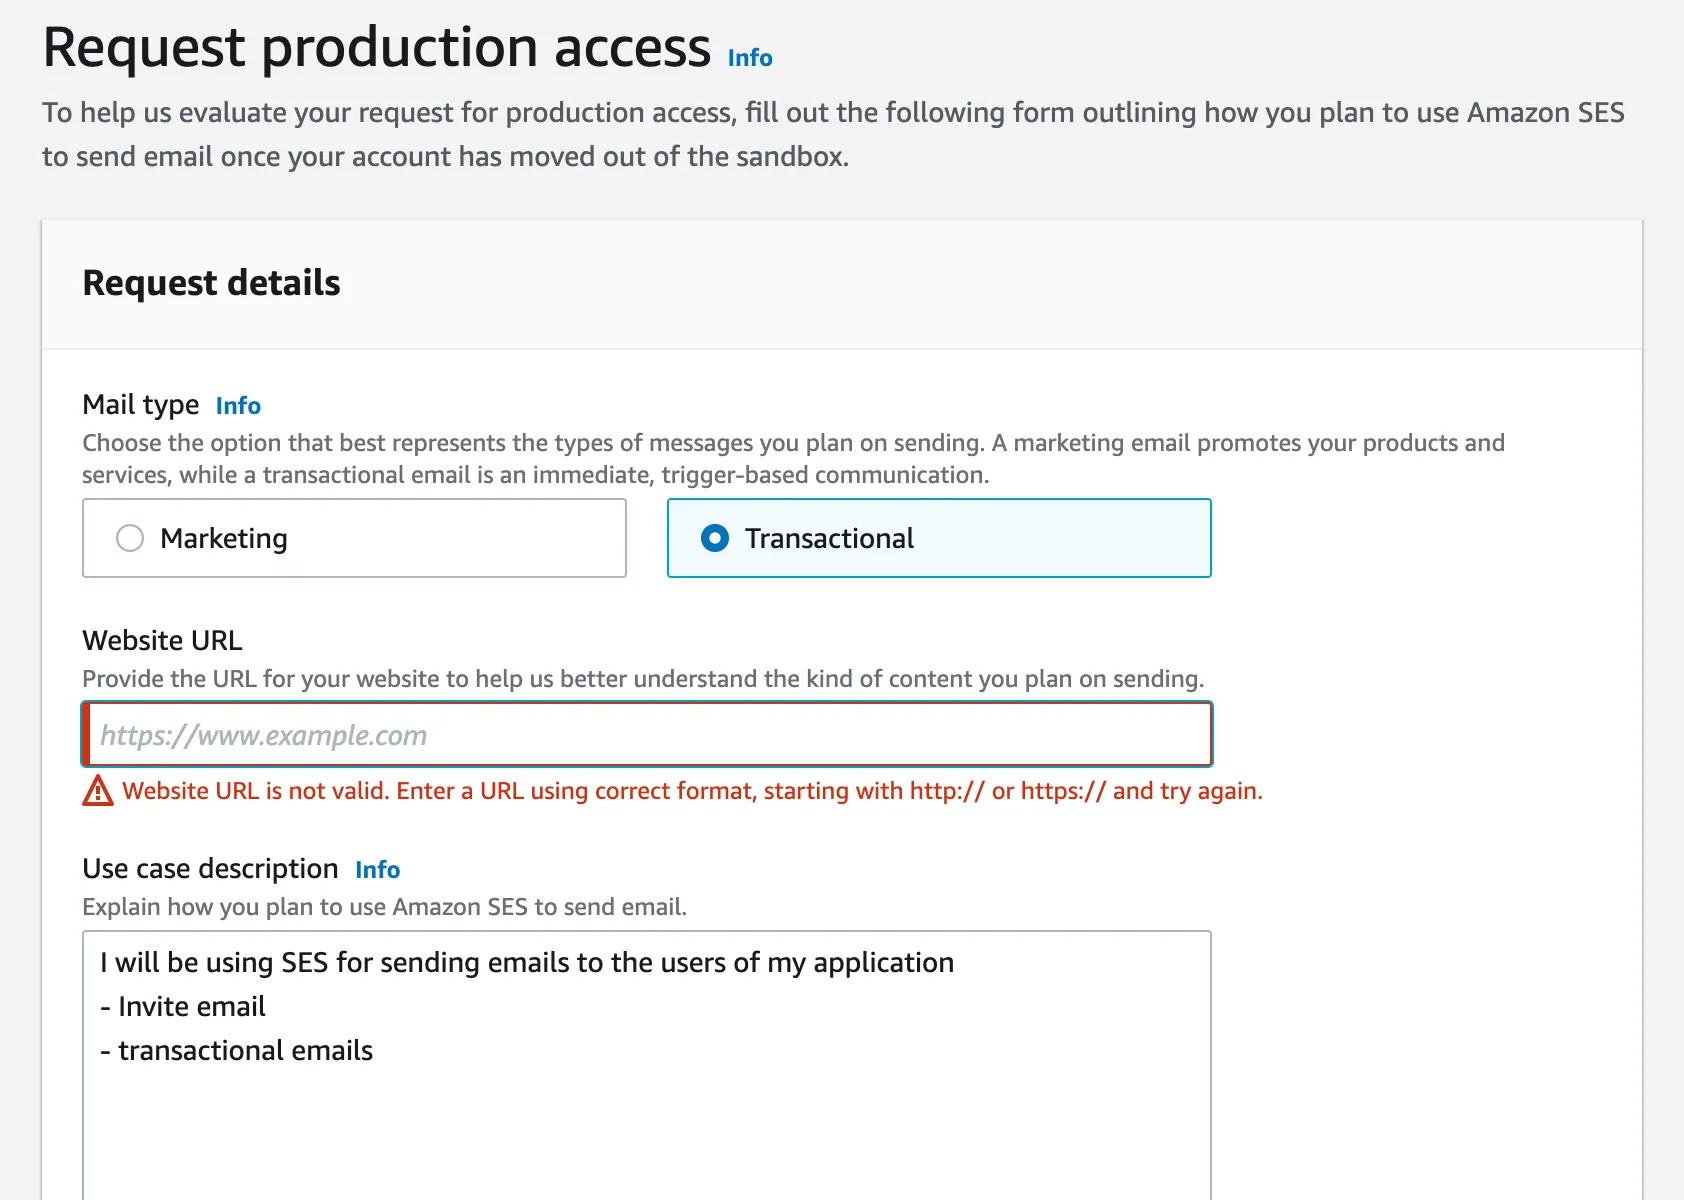
By default, Amazon SES operates in a sandbox environment for testing, where you can only send emails to verified email addresses.
To start sending emails to a broader audience, you need to move out of the sandbox by submitting a request to Amazon. This process involves explaining your use case and how you plan to manage bounces and complaints.
How to Request for Production Access
Access the Limit Increase Form: From the Amazon SES console, navigate to the "Sending Statistics" dashboard, where you'll find a prompt or link to "Request Production Access" or directly access the AWS Support Center and open a new case for a "Service Limit Increase."
Fill Out the Request Form: You'll need to provide details about your use case, including:
- The types of emails you plan to send (e.g., transactional, marketing).
- How you collect email addresses and ensure consent.
- Your strategies for handling bounces and complaints.
Submit the Request: After filling out the form with the necessary details, submit your request for review by the AWS team.
Wait for Approval: AWS will review your request to ensure that your email-sending practices align with their policies aimed at maintaining high deliverability and a good sender reputation. This process can take a few days.
Sending Your First Email
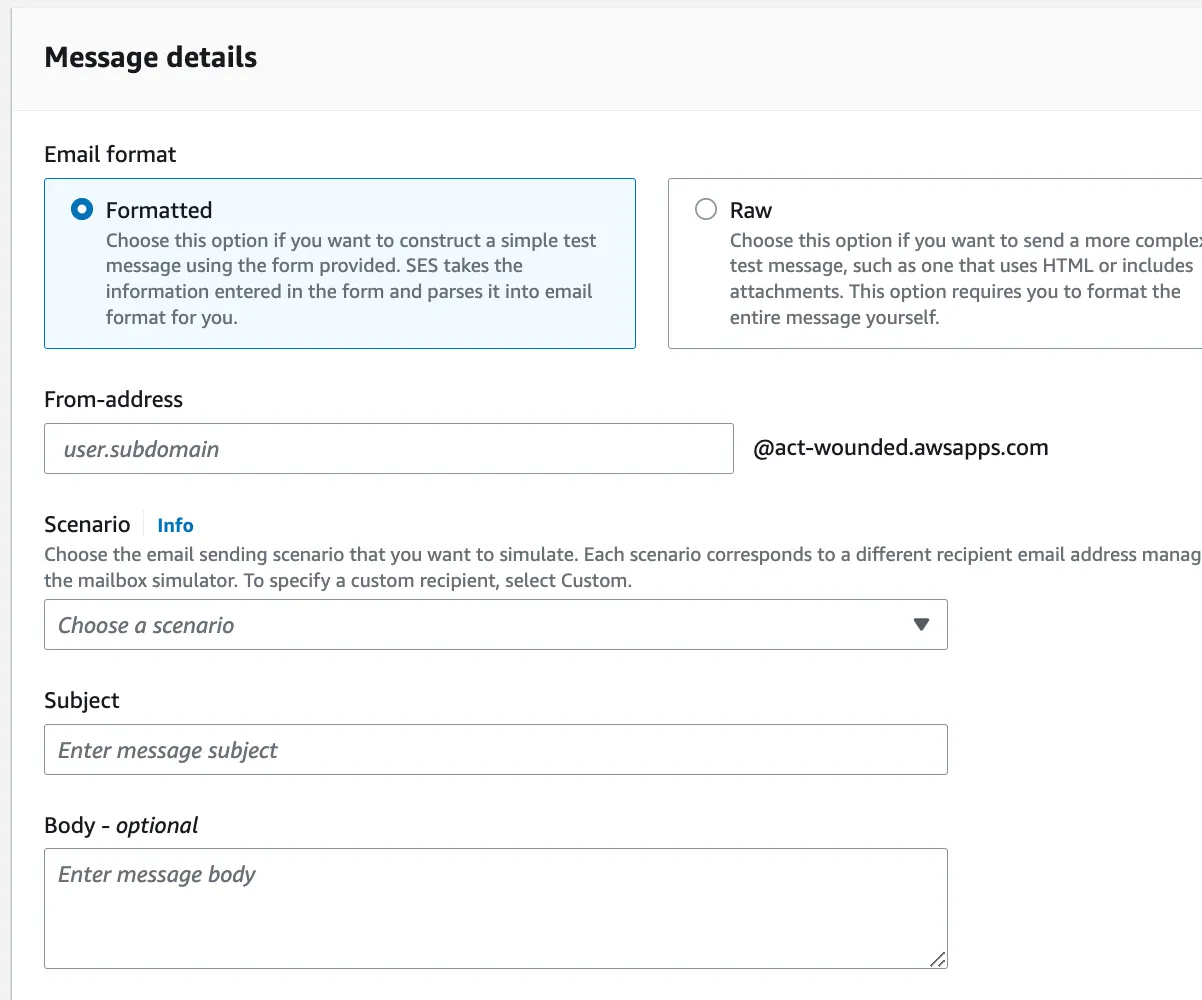
With everything set up, you're ready to send your first email. Whether you're using the SES API or SMTP interface, Amazon SES makes it easy to send transactional or marketing emails.
- Sending via API: Use the AWS SDK in your preferred programming language to call the Amazon SES API, providing details such as the sender, recipient, subject, and body of your email.
- Sending via SMTP: Configure your email client or application with the Amazon SES SMTP credentials and server details. This method is particularly user-friendly for those already familiar with SMTP settings.
How to Send Email via SMTP with Amazon SES

Sending emails through the Simple Mail Transfer Protocol (SMTP) interface of Amazon SES is a popular choice for its ease of integration with existing email applications or software that already use SMTP to send emails. Here’s how you can set it up:
Obtain SMTP Credentials
- Navigate to the Amazon SES console in your AWS account.
- Under the "Email Sending" section, choose "SMTP Settings."
- Click on “Create My SMTP Credentials.” Follow the prompts to create a new set of credentials. Note that these credentials are different from your regular AWS credentials.
Configure Your Email Client or Application:
- With your SMTP credentials at hand, configure your email client or application’s SMTP settings. You will need to input the following information:
- SMTP server name: You can find this in the "SMTP Settings" section of the Amazon SES console. It typically follows the format email-smtp.[region].amazonaws.com.
- SMTP port: Amazon SES supports ports 25, 465, or 587.
- SMTP username and password: Use the credentials you generated in the first step.
- Encryption method: Choose TLS or SSL, depending on your email client’s capabilities and the port you’re using.
Send Your Email:
- Once your email client or application is configured, you can start sending emails as you normally would. The email will be sent through Amazon SES, and you can monitor the sending activity in the SES console.
How to Send Email by SES API
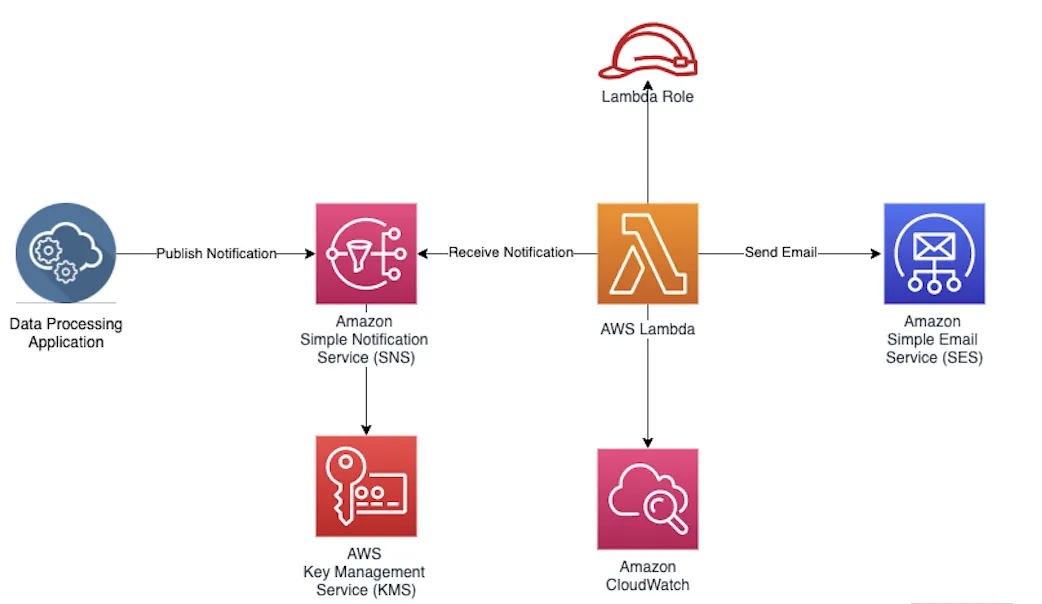
For developers or businesses looking for a more programmatic approach to email sending, using the Amazon SES API provides flexibility and powerful integration options. Here’s how to get started:
setup AWS SDK:
- Choose and set up the AWS Software Development Kit (SDK) for your preferred programming language (e.g., Python, Java, .NET).
- The AWS SDK simplifies the process of calling AWS services, including Amazon SES, by providing libraries, code samples, and documentation.
Compose Your Email:
- Using the AWS SDK, you can programmatically create your email message. This involves specifying the sender (Source), the recipient(s) (ToAddresses, CcAddresses, BccAddresses), the message body (Text and/or Html), and the subject (Data).
- You can also include attachments and use SES email templates for personalized emails.
Call the SES API to Send the Email:
- Make a call to the SendEmail or SendRawEmail operation of the Amazon SES API, passing in the details of your email message.
- The difference between these two operations is that SendEmail allows you to pass in the composed email components directly, while SendRawEmail requires you to construct the entire email message in MIME format, offering more flexibility for complex messages.
Monitoring and Optimizing
After sending emails, it's important to monitor their performance and optimize future sends based on the insights gained:
- Use Amazon SES Analytics: Track delivery rates, bounce rates, and open and click statistics to understand how your emails are performing for your most customers
- Optimize for Better Performance: Based on analytics, refine your email content, timing, and targeting to improve engagement and deliverability.
Amazon SES Pricing

Comparison
Best Practices for Email Marketing with Amazon SES
1. Understand Amazon SES Limitations and Capabilities
Before you begin sending emails, familiarize yourself with Amazon SES's features and limitations.
- Sending Quotas: Amazon SES applies sending limits to safeguard against abuse and maintain high deliverability. Initially, you're placed in a sandbox environment, allowing you to send 200 emails per 24-hour period to verified email addresses. To increase your sending quotas and begin sending emails on a larger scale, you must apply to move out of the sandbox environment through requests to Amazon. This step is crucial for large-scale campaigns.
- Email Content Personalization: Amazon SES supports email personalization using variables. This feature enables you to tailor your email content to individual recipients, improving engagement rates. Utilizing SES to send personalized content is a powerful strategy to enhance the impact of your transactional email and marketing messages.
2. Comply with Email Sending Best Practices
Adhering to best practices in email marketing not only improves your sender reputation but also enhances engagement.
- Email List Hygiene: Regularly clean your email list to remove invalid or unengaged subscribers. This reduces bounce rates and improves your sender reputation, crucial for maintaining high deliverability when using SES to send emails.
- Consent and Opt-in: Ensure you have explicit consent from users before sending them marketing emails. An opt-in mechanism helps build a list of engaged subscribers and complies with regulations like GDPR and CAN-SPAM Act, making it a critical step before you begin sending emails.
- Responsive Design: With over 50% of emails opened on mobile devices, it's vital to use responsive email designs. Responsive designs ensure your emails look good and are readable on any device, enhancing the user experience in both marketing and transactional email communications.
3. Monitor and Optimize Your Campaigns
The success of email marketing campaigns hinges on continuous monitoring and optimization.
- Use Analytics: Amazon SES provides detailed metrics on sends, deliveries, opens, clicks, bounces, and complaints. Monitor these metrics closely to understand your campaign's performance and identify areas for improvement when using SES to send emails.
- A/B Testing: Regularly conduct A/B tests on your email subject lines, content, and call-to-actions. A/B testing helps you understand what resonates best with your audience, allowing you to optimize future campaigns for better engagement and conversion rates.
- Feedback Loops and Adjustments: Set up feedback loops with Amazon SES to receive notifications about bounces, complaints, and deliveries. Use this feedback to adjust your email sending practices and improve deliverability and engagement, particularly in transactional email communications.
4. Implement Email Authentication Techniques
Email authentication helps protect your domain from being used for email spoofing and phishing.
- SPF (Sender Policy Framework): SPF allows email servers to verify that emails sent from your domain are authorized by you. This is a DNS record that specifies which IP addresses and hosts are allowed to send email on behalf of your domain.
- DKIM (DomainKeys Identified Mail): DKIM adds a digital signature to your emails, allowing receiving email servers to verify that the email was indeed sent from your domain and has not been tampered with during transit.
- DMARC (Domain-based Message Authentication, Reporting & Conformance): DMARC uses SPF and DKIM to provide a framework for email authentication, reporting, and conformance. It tells email receivers what to do if emails from your domain fail SPF or DKIM checks.
Concluding Steps
Amazon Simple Email Service (Amazon SES) is a powerful, cost-effective solution for email marketing, allowing you to send up to 62,000 emails monthly for free from an Amazon EC2 instance. To maximize the benefits of Amazon SES, ensure your mailing list is of high quality, verify your email identities, and understand the platform's capabilities.
Adhere to best practices like maintaining list hygiene, securing explicit consent, and using responsive design. Monitoring campaigns through SES analytics and implementing email authentication methods like SPF, DKIM, and DMARC are crucial for improving deliverability and engagement. Leveraging Amazon SES effectively means tapping into Amazon's reliable infrastructure for scalable email marketing success.


