
.svg)
.svg)
.svg)
Setting up MX Records for Google Workspace on Namecheap is a straightforward process.
This guide will walk you through each step, ensuring a smooth integration of your domain with Google's email services.
This setup is crucial for ensuring your domain's emails are correctly routed through Google's servers.
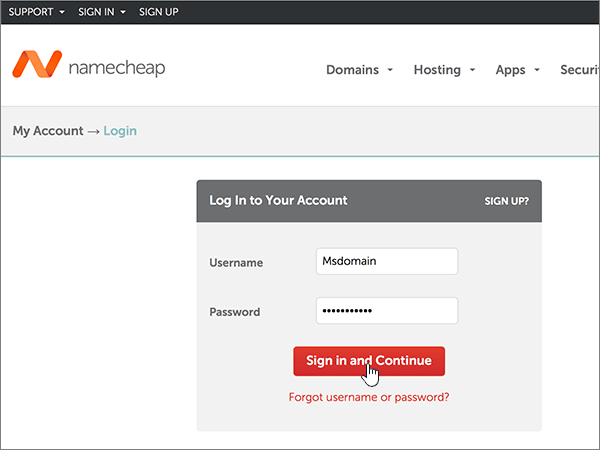
Step 1: Accessing Your Namecheap Account
How to Do It
Start by logging into your Namecheap account. The login option is typically located in the top left corner of the Namecheap homepage.
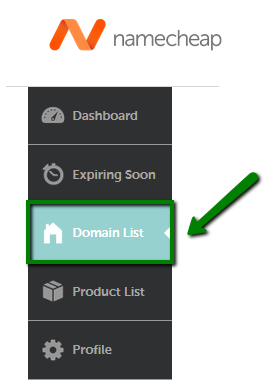
Step 2: Selecting Your Domain
How to Do It:
Once logged in, navigate to the Domain List, found in the left sidebar. Here, you'll see a list of your domains.
Click 'Manage' next to the domain you intend to set up with Google Workspace.
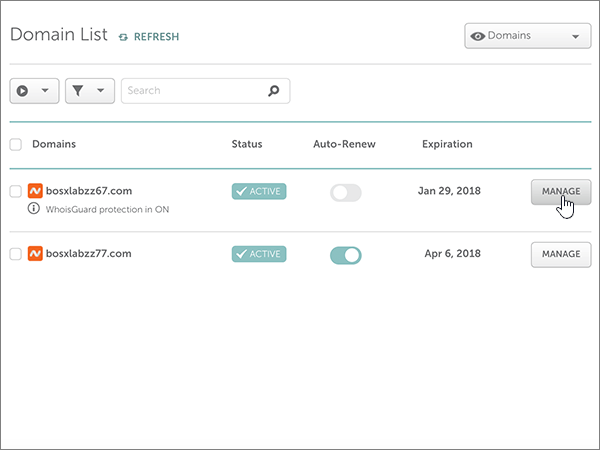
Select the domain and click Manage
Step 3: Modifying DNS Settings
How to Do It:
In the domain management area, go to the 'Advanced DNS' tab. You'll find the Mail Settings section here, which is essential for setting up your MX records.

Step 4: Setting Up MX Records for Google Workspace
Choosing the Right Setting
Within Mail Settings, you'll see several options. Since we're focusing on Google Workspace, look for the 'Gmail' option. Selecting this will automatically configure the necessary MX records for Google Workspace.
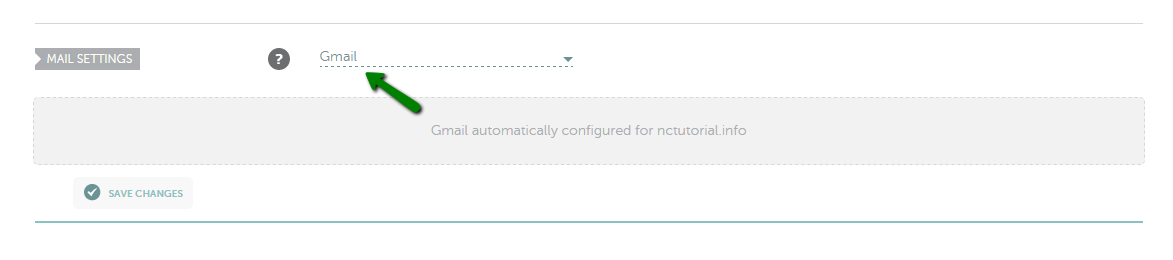
Find the Mail Settings section and select Google Workspace from the drop-down menu.
Customizing MX Records (Post-April 2023 Subscribers)
If you subscribed to Google Workspace after April 2023, you have the option to use a single MX record. Choose 'Custom MX' and enter the following details:
- Type: MX Record
- Host: @
- Value: SMTP.GOOGLE.COM
- Priority: 1
- TTL: Automatic
Step 5: Saving Your Changes
Finalizing the Setup:
After selecting the appropriate settings, don't forget to save your changes. This step is crucial for the new MX records to be implemented.
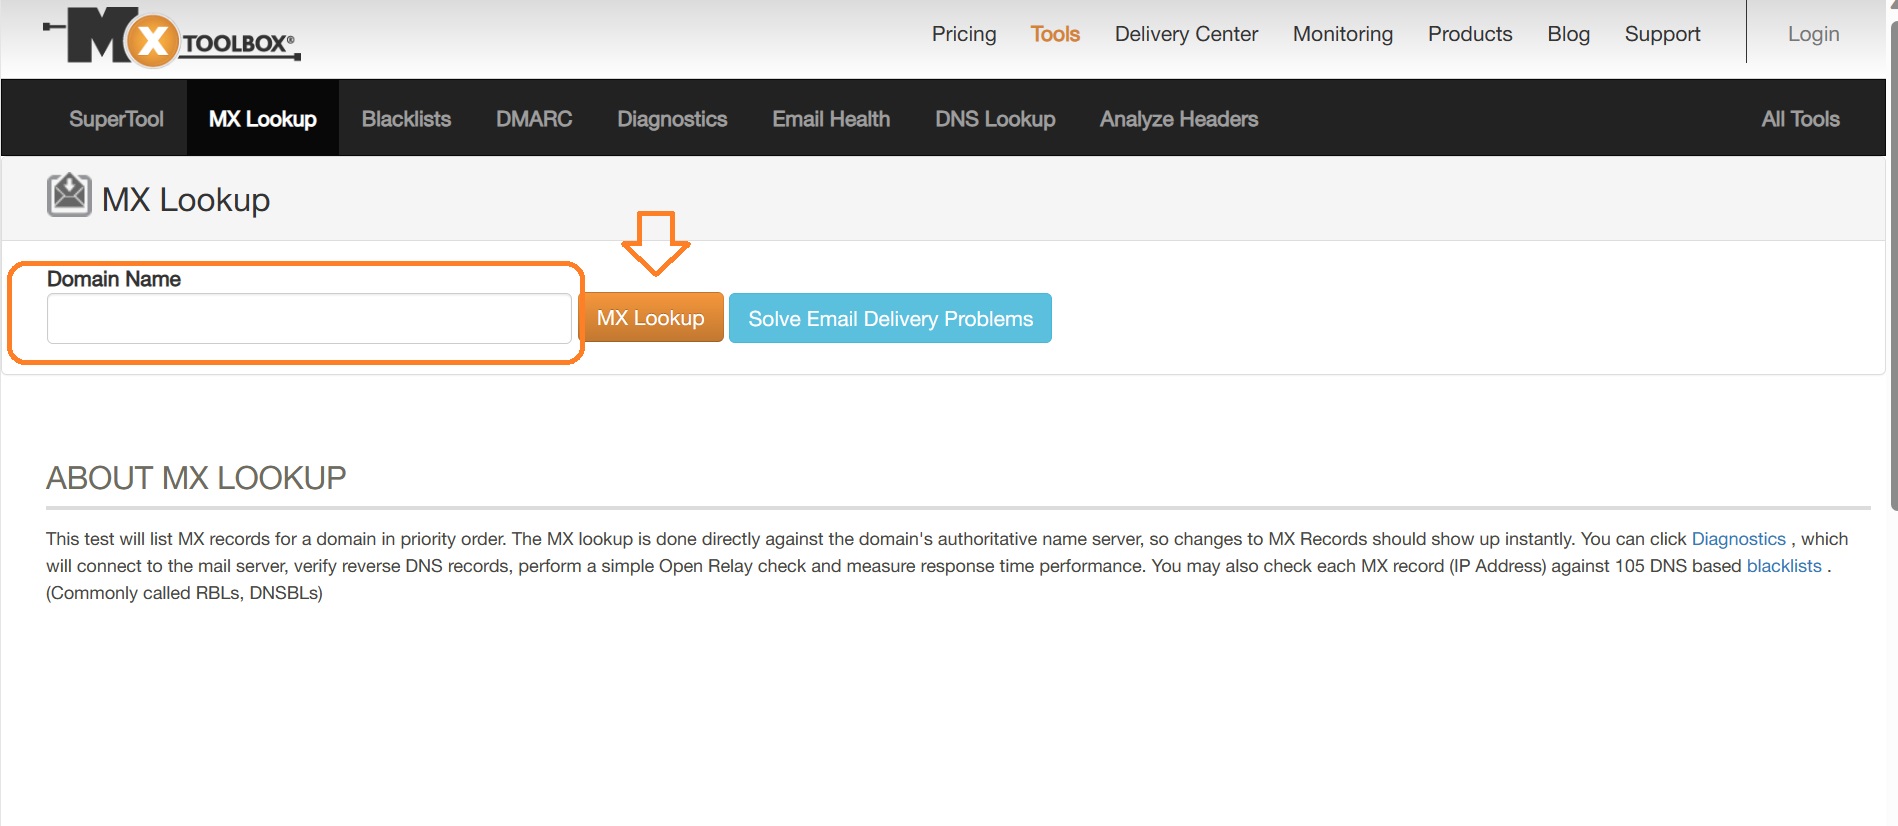
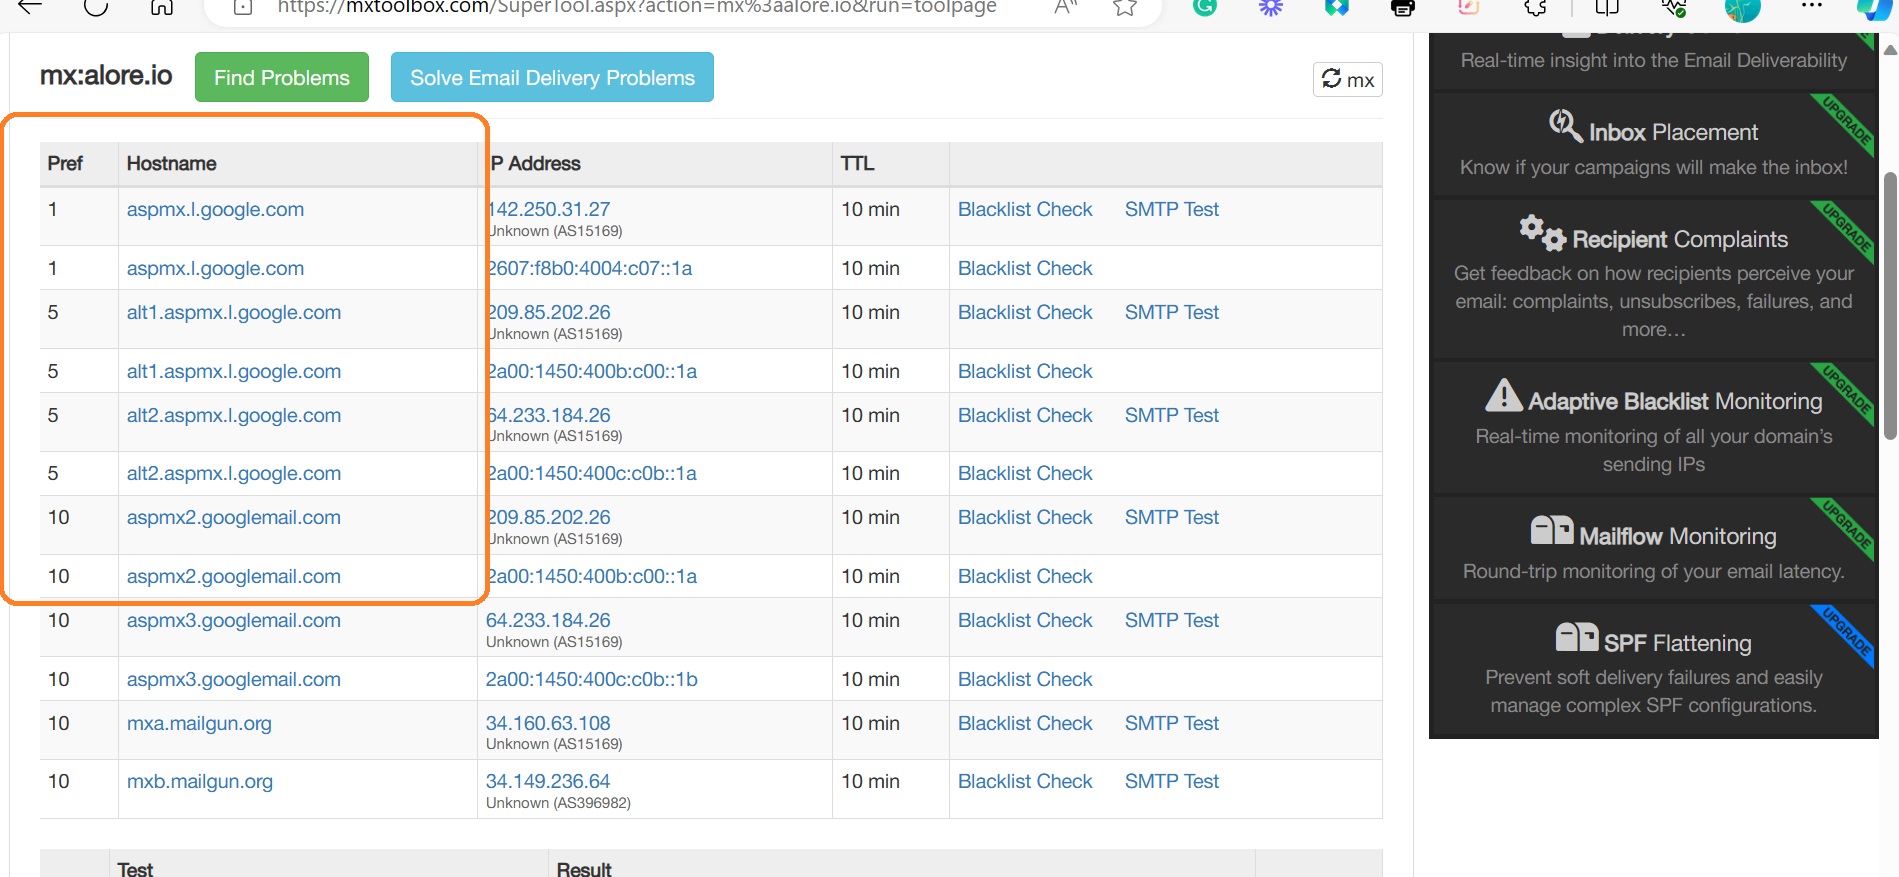
Step 6: Verify the changes
Verify the setup using an MX Lookup tool like "mxtoolbox."
Go to MX Lookup Tool - Check your DNS MX Records online - MxToolbox
Step 7: Send a Test Email
Finally, send an email to a user in your Google Workspace account to confirm everything is set correctly.
Understanding the Impact
Why MX Records Matter
MX records are like the postal service for your domain's email. They tell the internet where to deliver emails sent to your domain. By setting them up for Google Workspace, you're directing all email traffic to Google's servers, enabling you to use Gmail with your custom domain.
Propagation Time
It generally takes about 30 minutes for these changes to propagate across the internet. However, sometimes it may take a bit longer for everything to be fully functional.
With these steps, you've successfully configured your domain on Namecheap to work seamlessly with Google Workspace, allowing you to use Gmail's robust features with your own domain name.